Opening excuse
One of my new year resolutions was to post more here, but with a new child, sick kids, computer continually eating my homework, dying phones eating my home work, it hasn’t really worked out. Well that’s my excuses out of the way…
Background
I’ve been a happy Up Plus! 3D printer user for several years, convincing probably around 20+ people I know to get one. However with the concern of particle emissions from 3D printers and a new-born child in 2013, I decided to err on the paranoid side and off-loaded my printer to someone else.
The relapse
Though an engineer always has an itch to scratch wanting to make gadgets and stuff so… unashamedly (or slightly ashamed) I got myself another 3D printer (and a Thermomix… but that’s another story).

The Tiertime Up Box 3D Printer arrived just over the new year break for me to get my grubby little hands on it. The size of the ‘box’ it came in could have easily accommodated 4 small children and I hit my first hurdle as soon as I tried opening the box, it needs two adults to unpack…
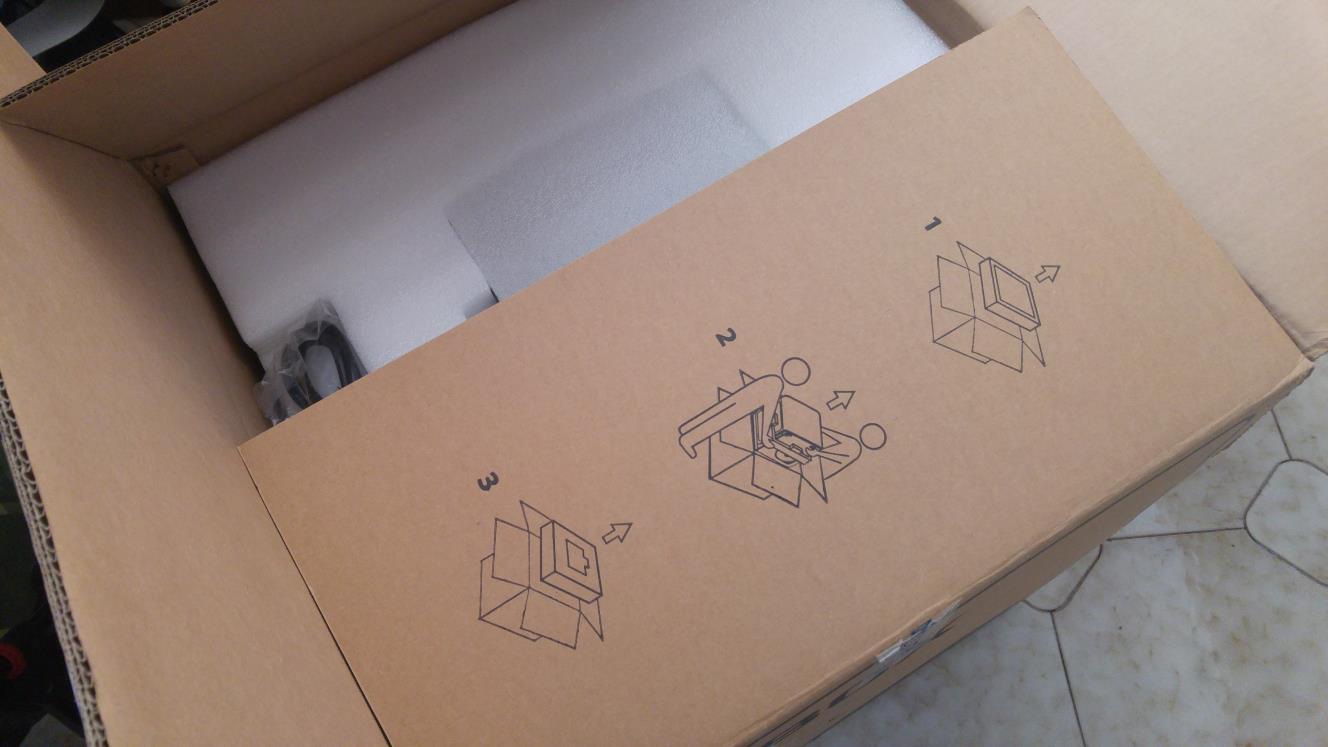
What’s inside the box…
Inside the box is a very professional set of packaging, protecting the contents. Like the previous Up! printers, there is almost no assembly involved and everything is almost good to go out of the box.
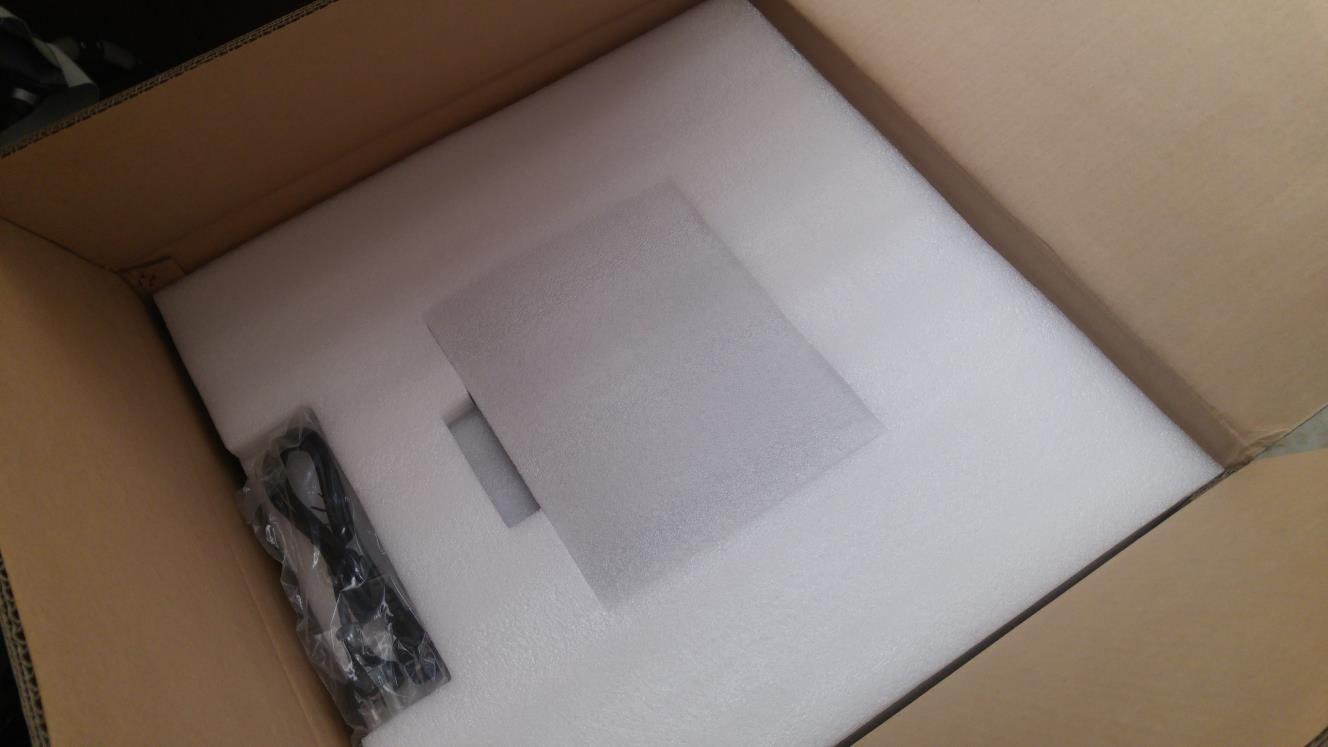
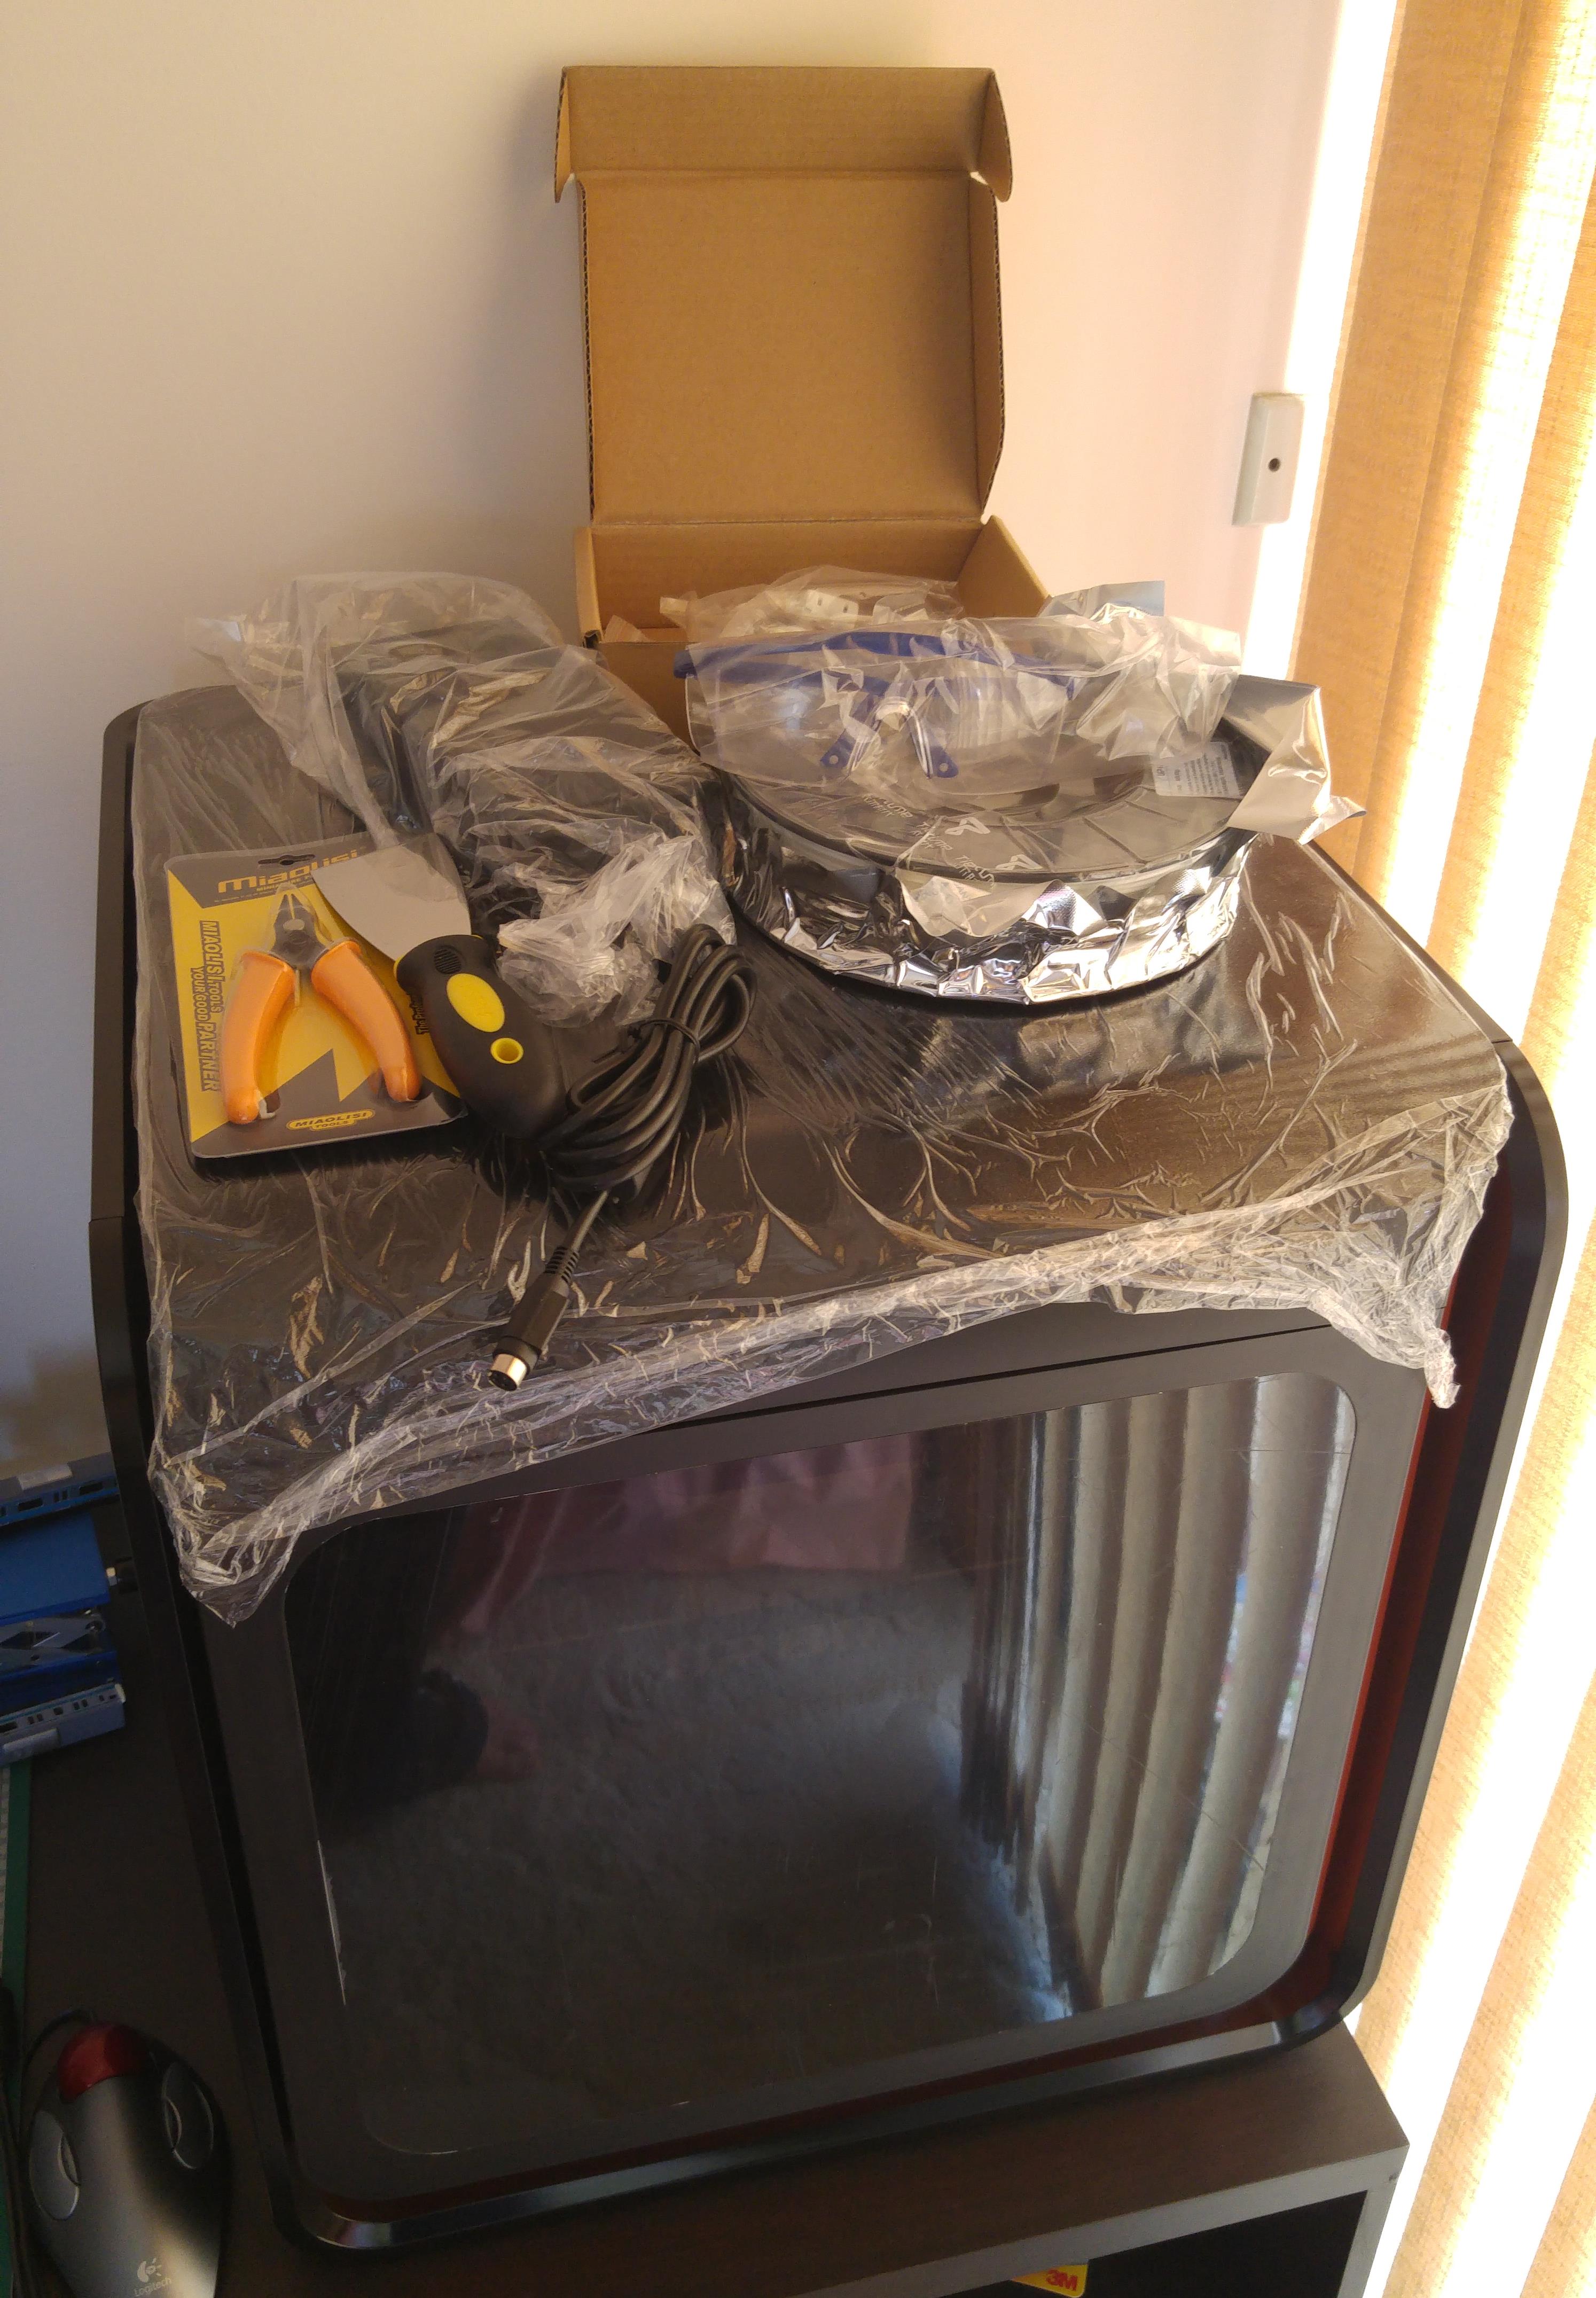
Behind all the styrofoam are contents similar to the original Up Plus and Up Mini. The photo below shows all the contents laid out on top of the printer. From a tools perspective, the very handy side cutters are still there with the very sharp spatula/scrapper thing. For safety, protective eye-wear is provided being a nice touch to protect your eyes from flying plastic when you’re removing support. The heavy gloves are no longer provided, but honestly I’ve never really used them.
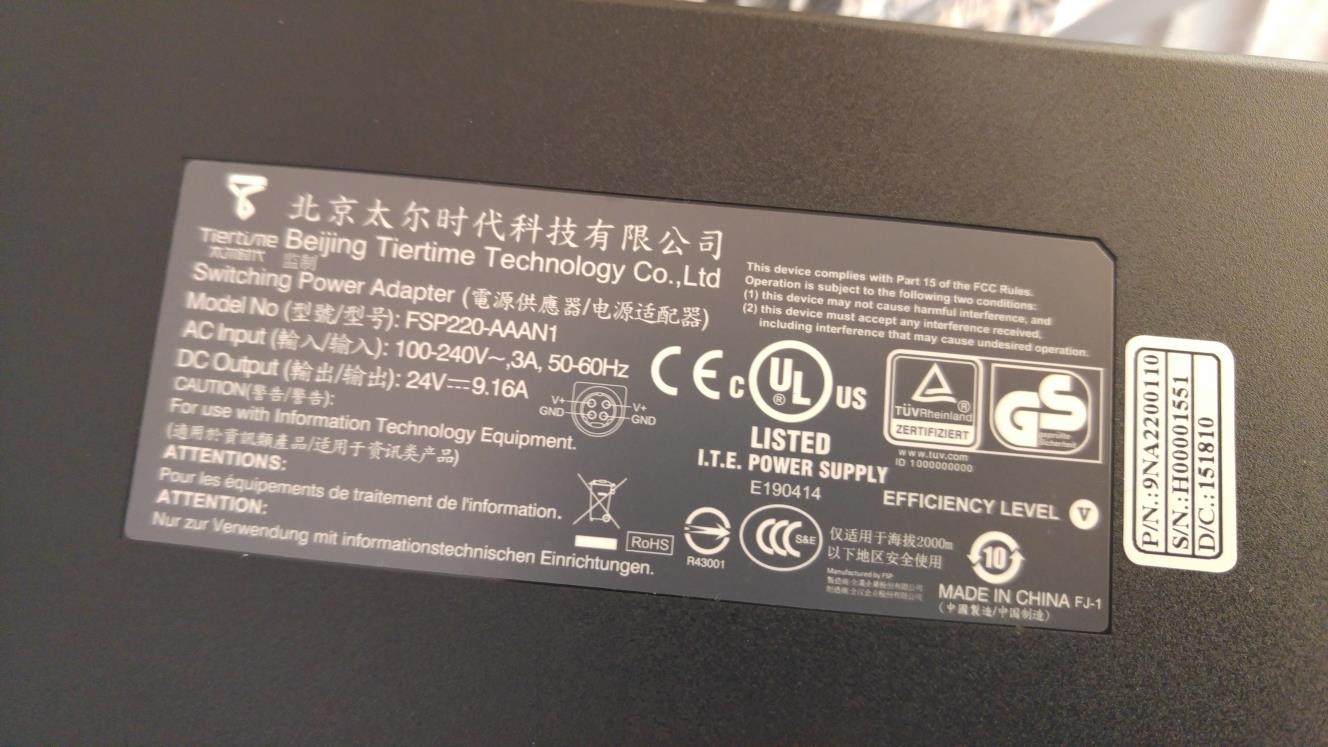
An USB cable is provided to connect to the computer as well as power cords and the power supply. Whereas the previous Up Plus and Up Mini printers used heavy duty Hewlett Packard laptop power suppliers, the Up Box appears to come with a branded power supply. Looking at the output (24V × 9.16A = 220W!!!), it probably is a case of out-growing the available off-the-shelf supplies.
The Up Box comes with a roll of filament so you can rock and start printing ASAP. I’m not sure who in their marketing department thought ‘Fila’ was a good idea, it sounds too much like the shoe brand and just confuses people I think. The Up ‘Fila’ment I’ve always found to be superior to most others you can buy, and the Up printers are tuned to work particularly well with it so I’ve gone ahead and bought 10 rolls…
The filament size has been downgraded from 700g to 500g, an odd choice considering the larger print area/volume of the Up Box. What were they thinking?

What’s in the Box within the box…
Everything inside is almost ready to go with nothing to assemble. There are however a whole bunch of cable ties, used to prevent the platform from rattling during transport, that needs to be snipped off. Luckily these are professionally labelled ‘Remove Me – Please remove me. I am shipping clip’. OK the last bit reads a bit funny, but you have to admit its kind of nice.

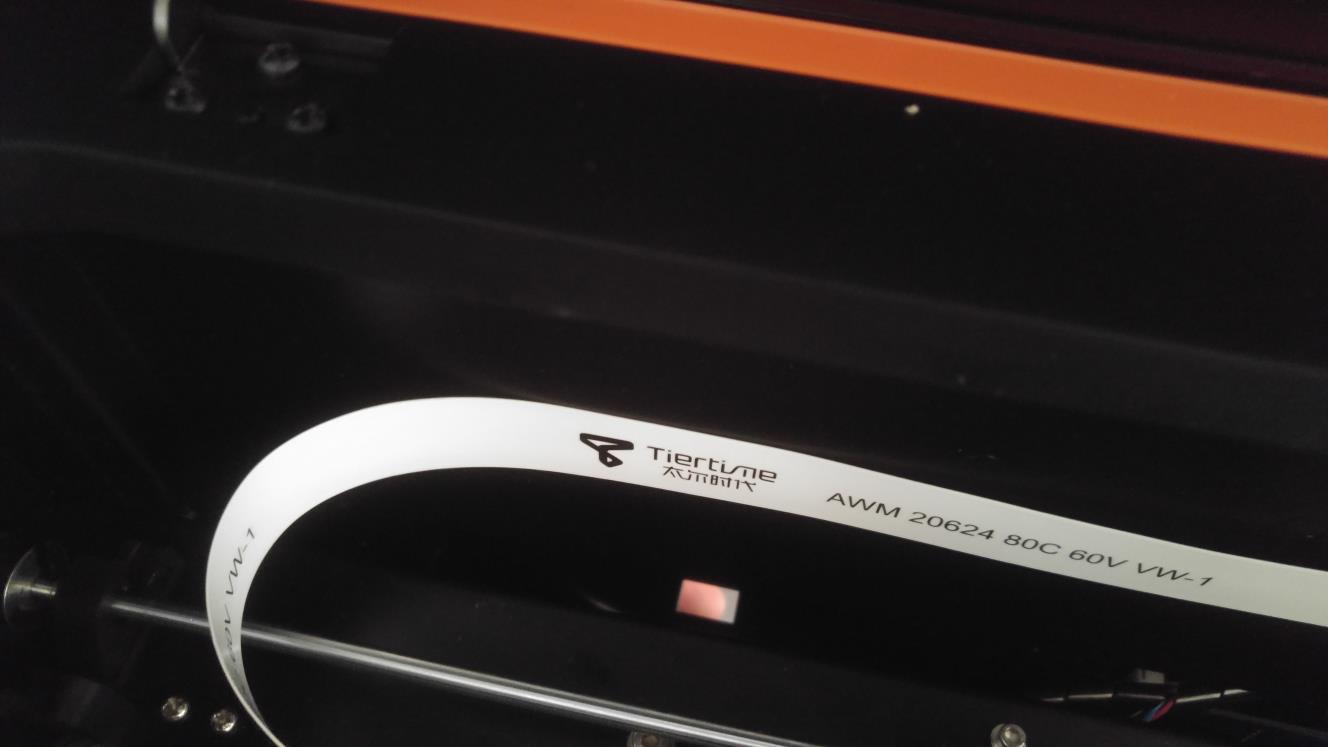
The internal build of the printer is nice a clean, with a two tone scheme (black and orange) consistent throughout. In the photo above, you can see the HEPA filter on the left. Below you will notice even the cable assemblies are professional labelled and branded giving the printer just a little bit more of the up-market feel (er…excuse the pun, definitely not intended).
The printer also comes with 4 print plates, 3 perforated much like those PCB type ones provided on the Up Plus and Mini as well as 1 smooth bed one presumably for PLA usage. The additional plates are handy and allows you to swap them out and continue printing without downtime. The plates I received unfortunately weren’t very consistent and a couple of them was very warped, putting them through a couple of print/heat cycles relieved the issue but clipping them on the first time proved tricky.
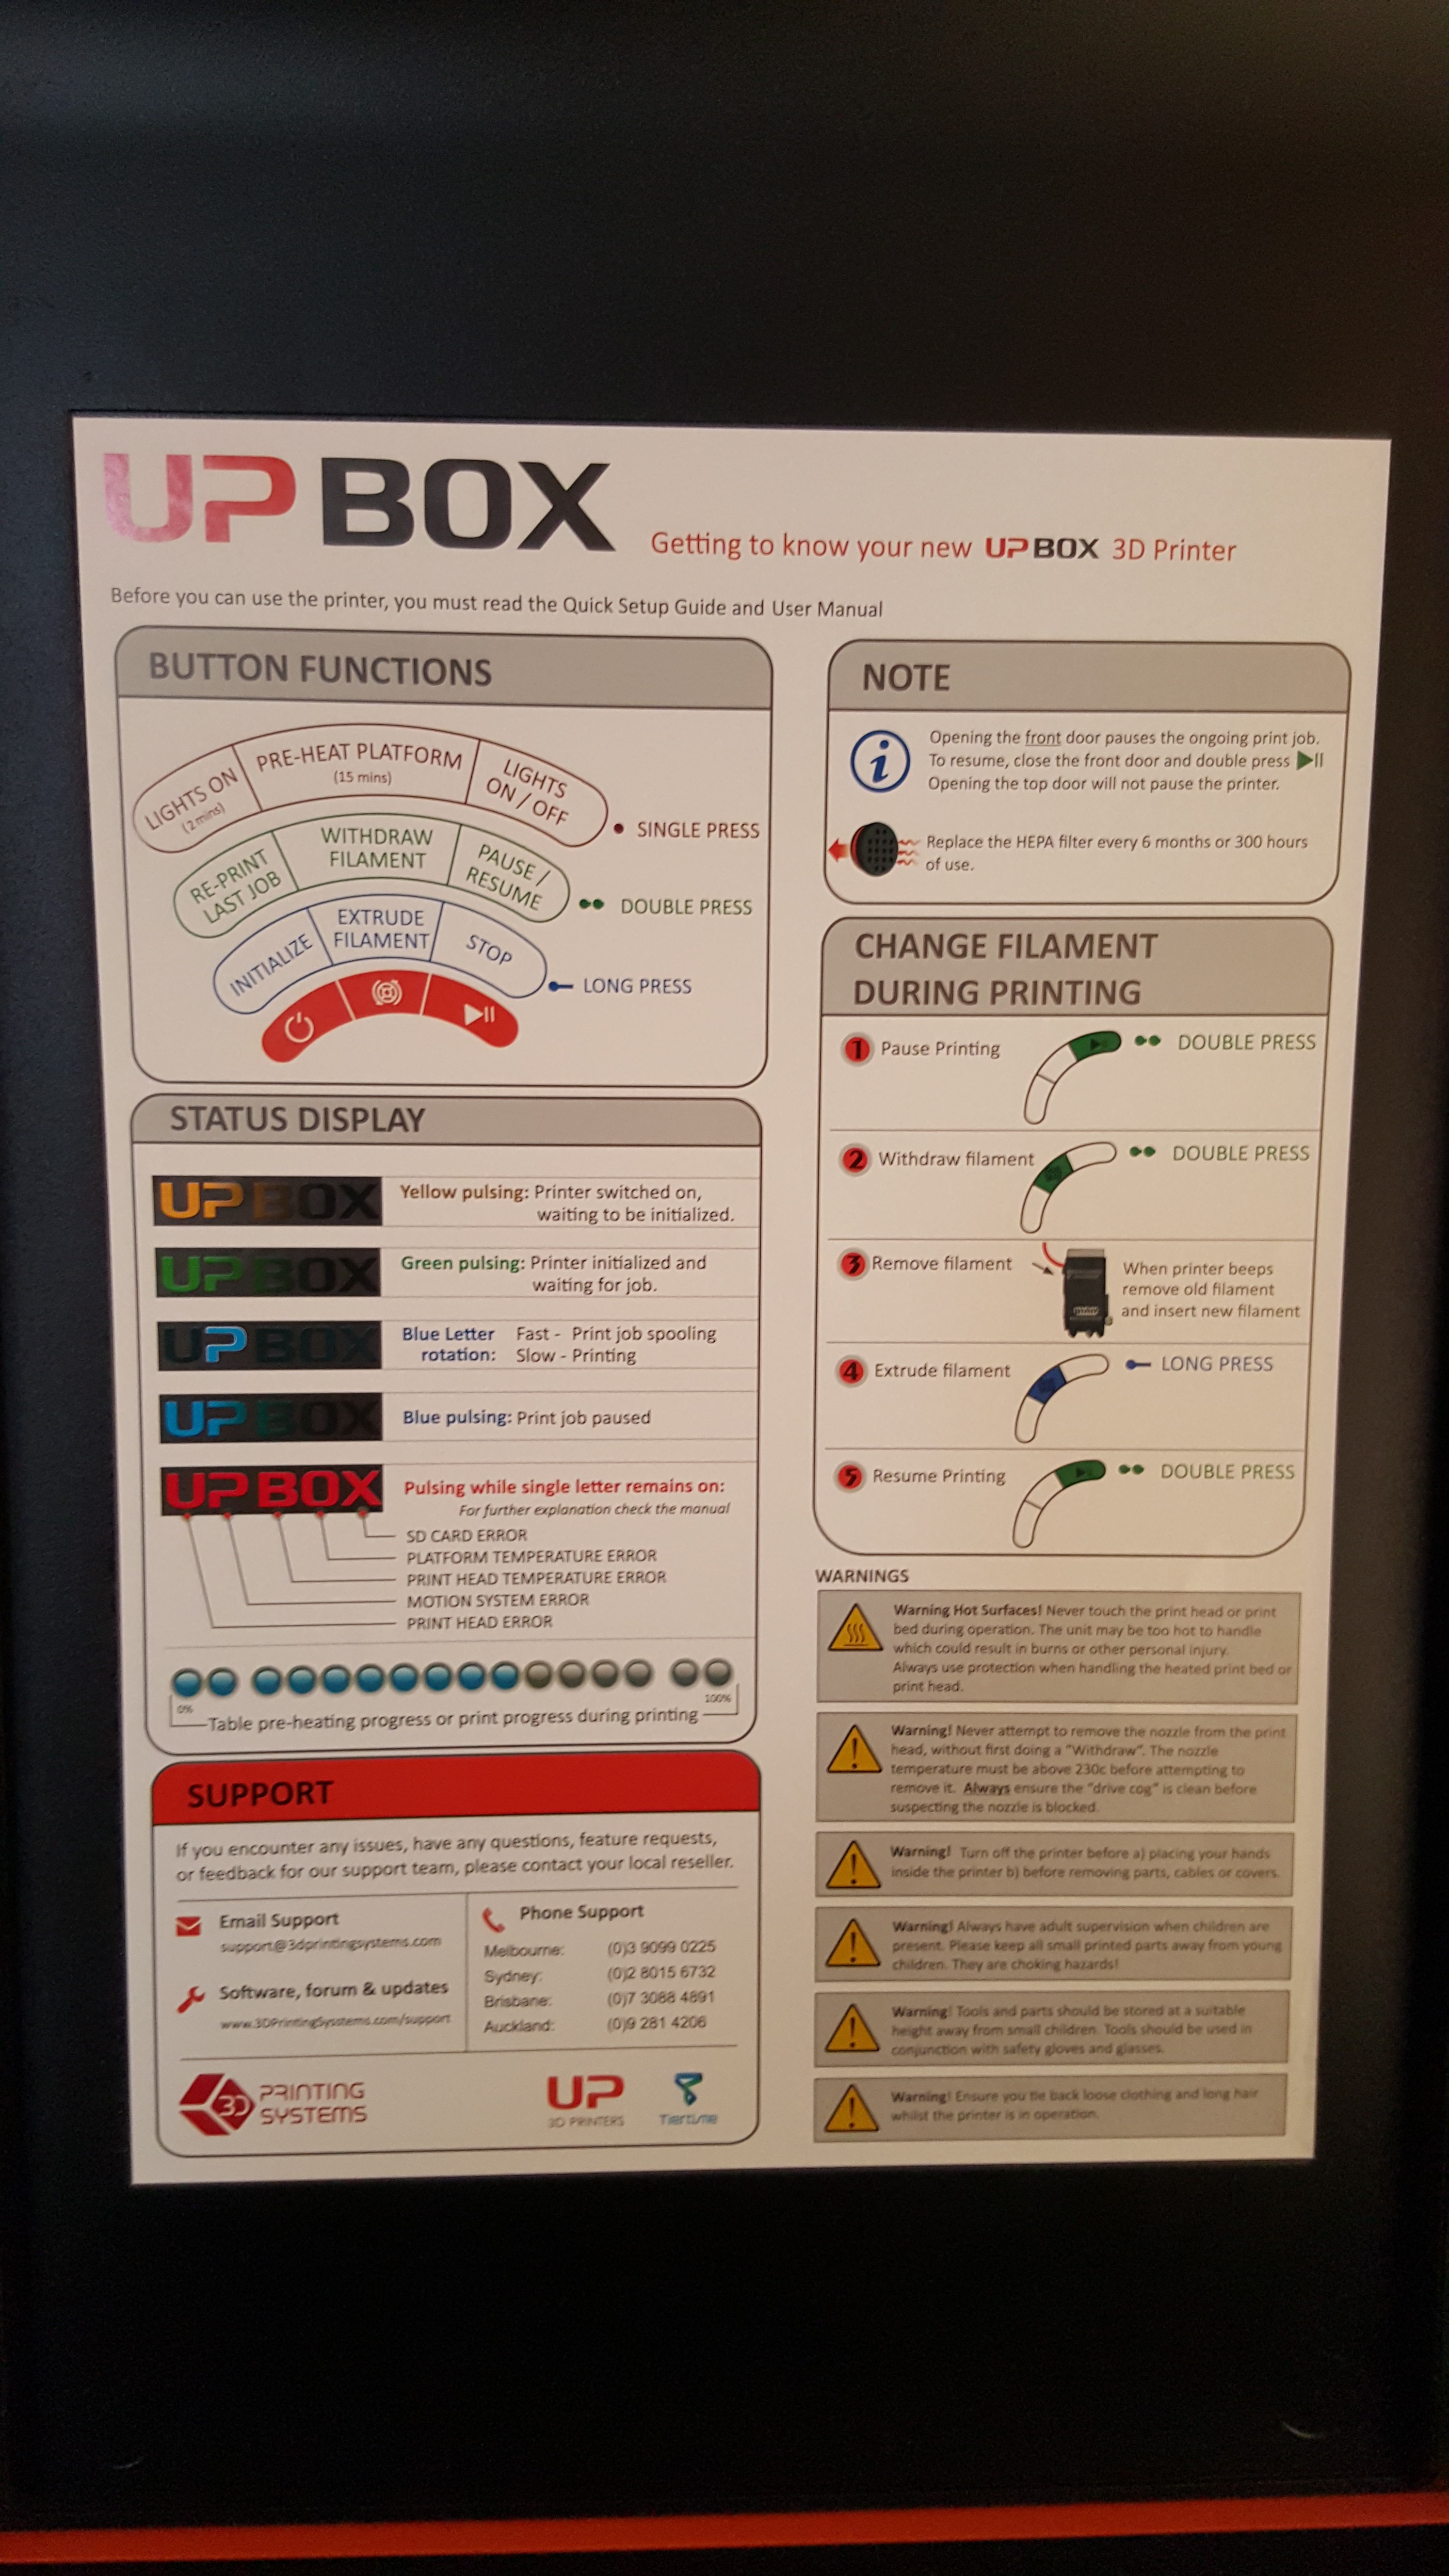
The underside of the lid conveniently has a quick start guide with instructions on use which I thought was a nice touch.
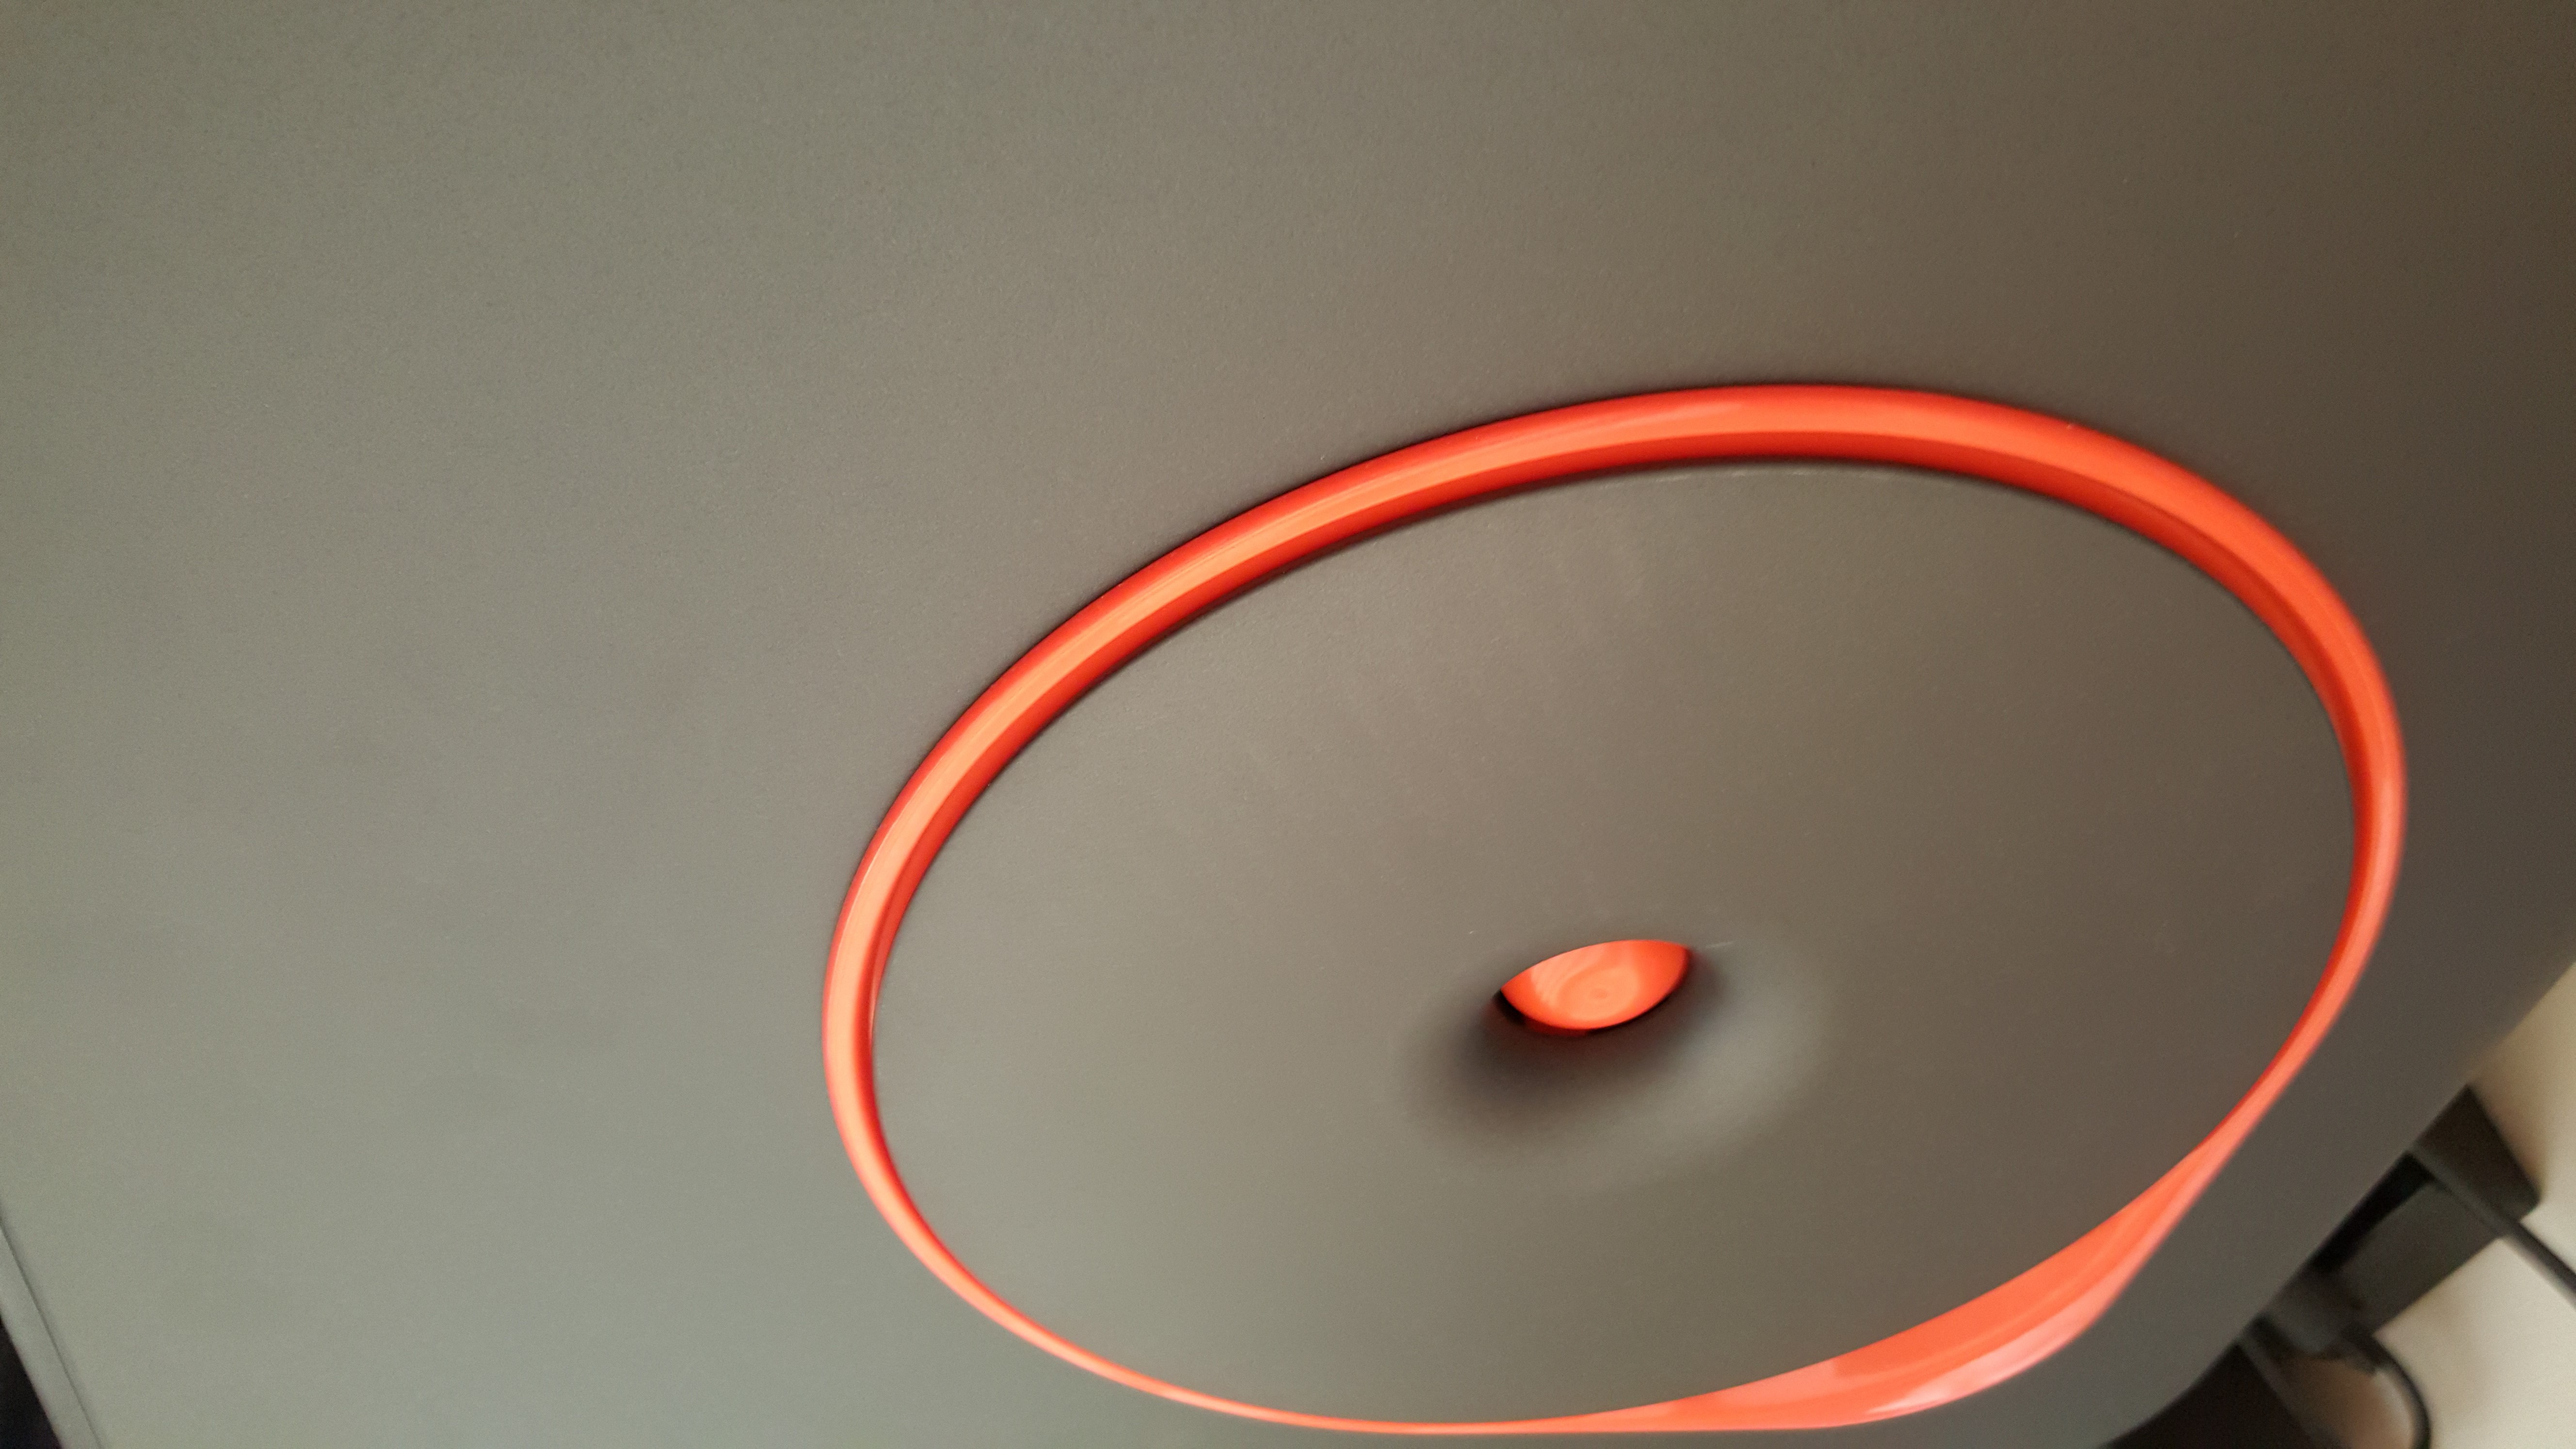
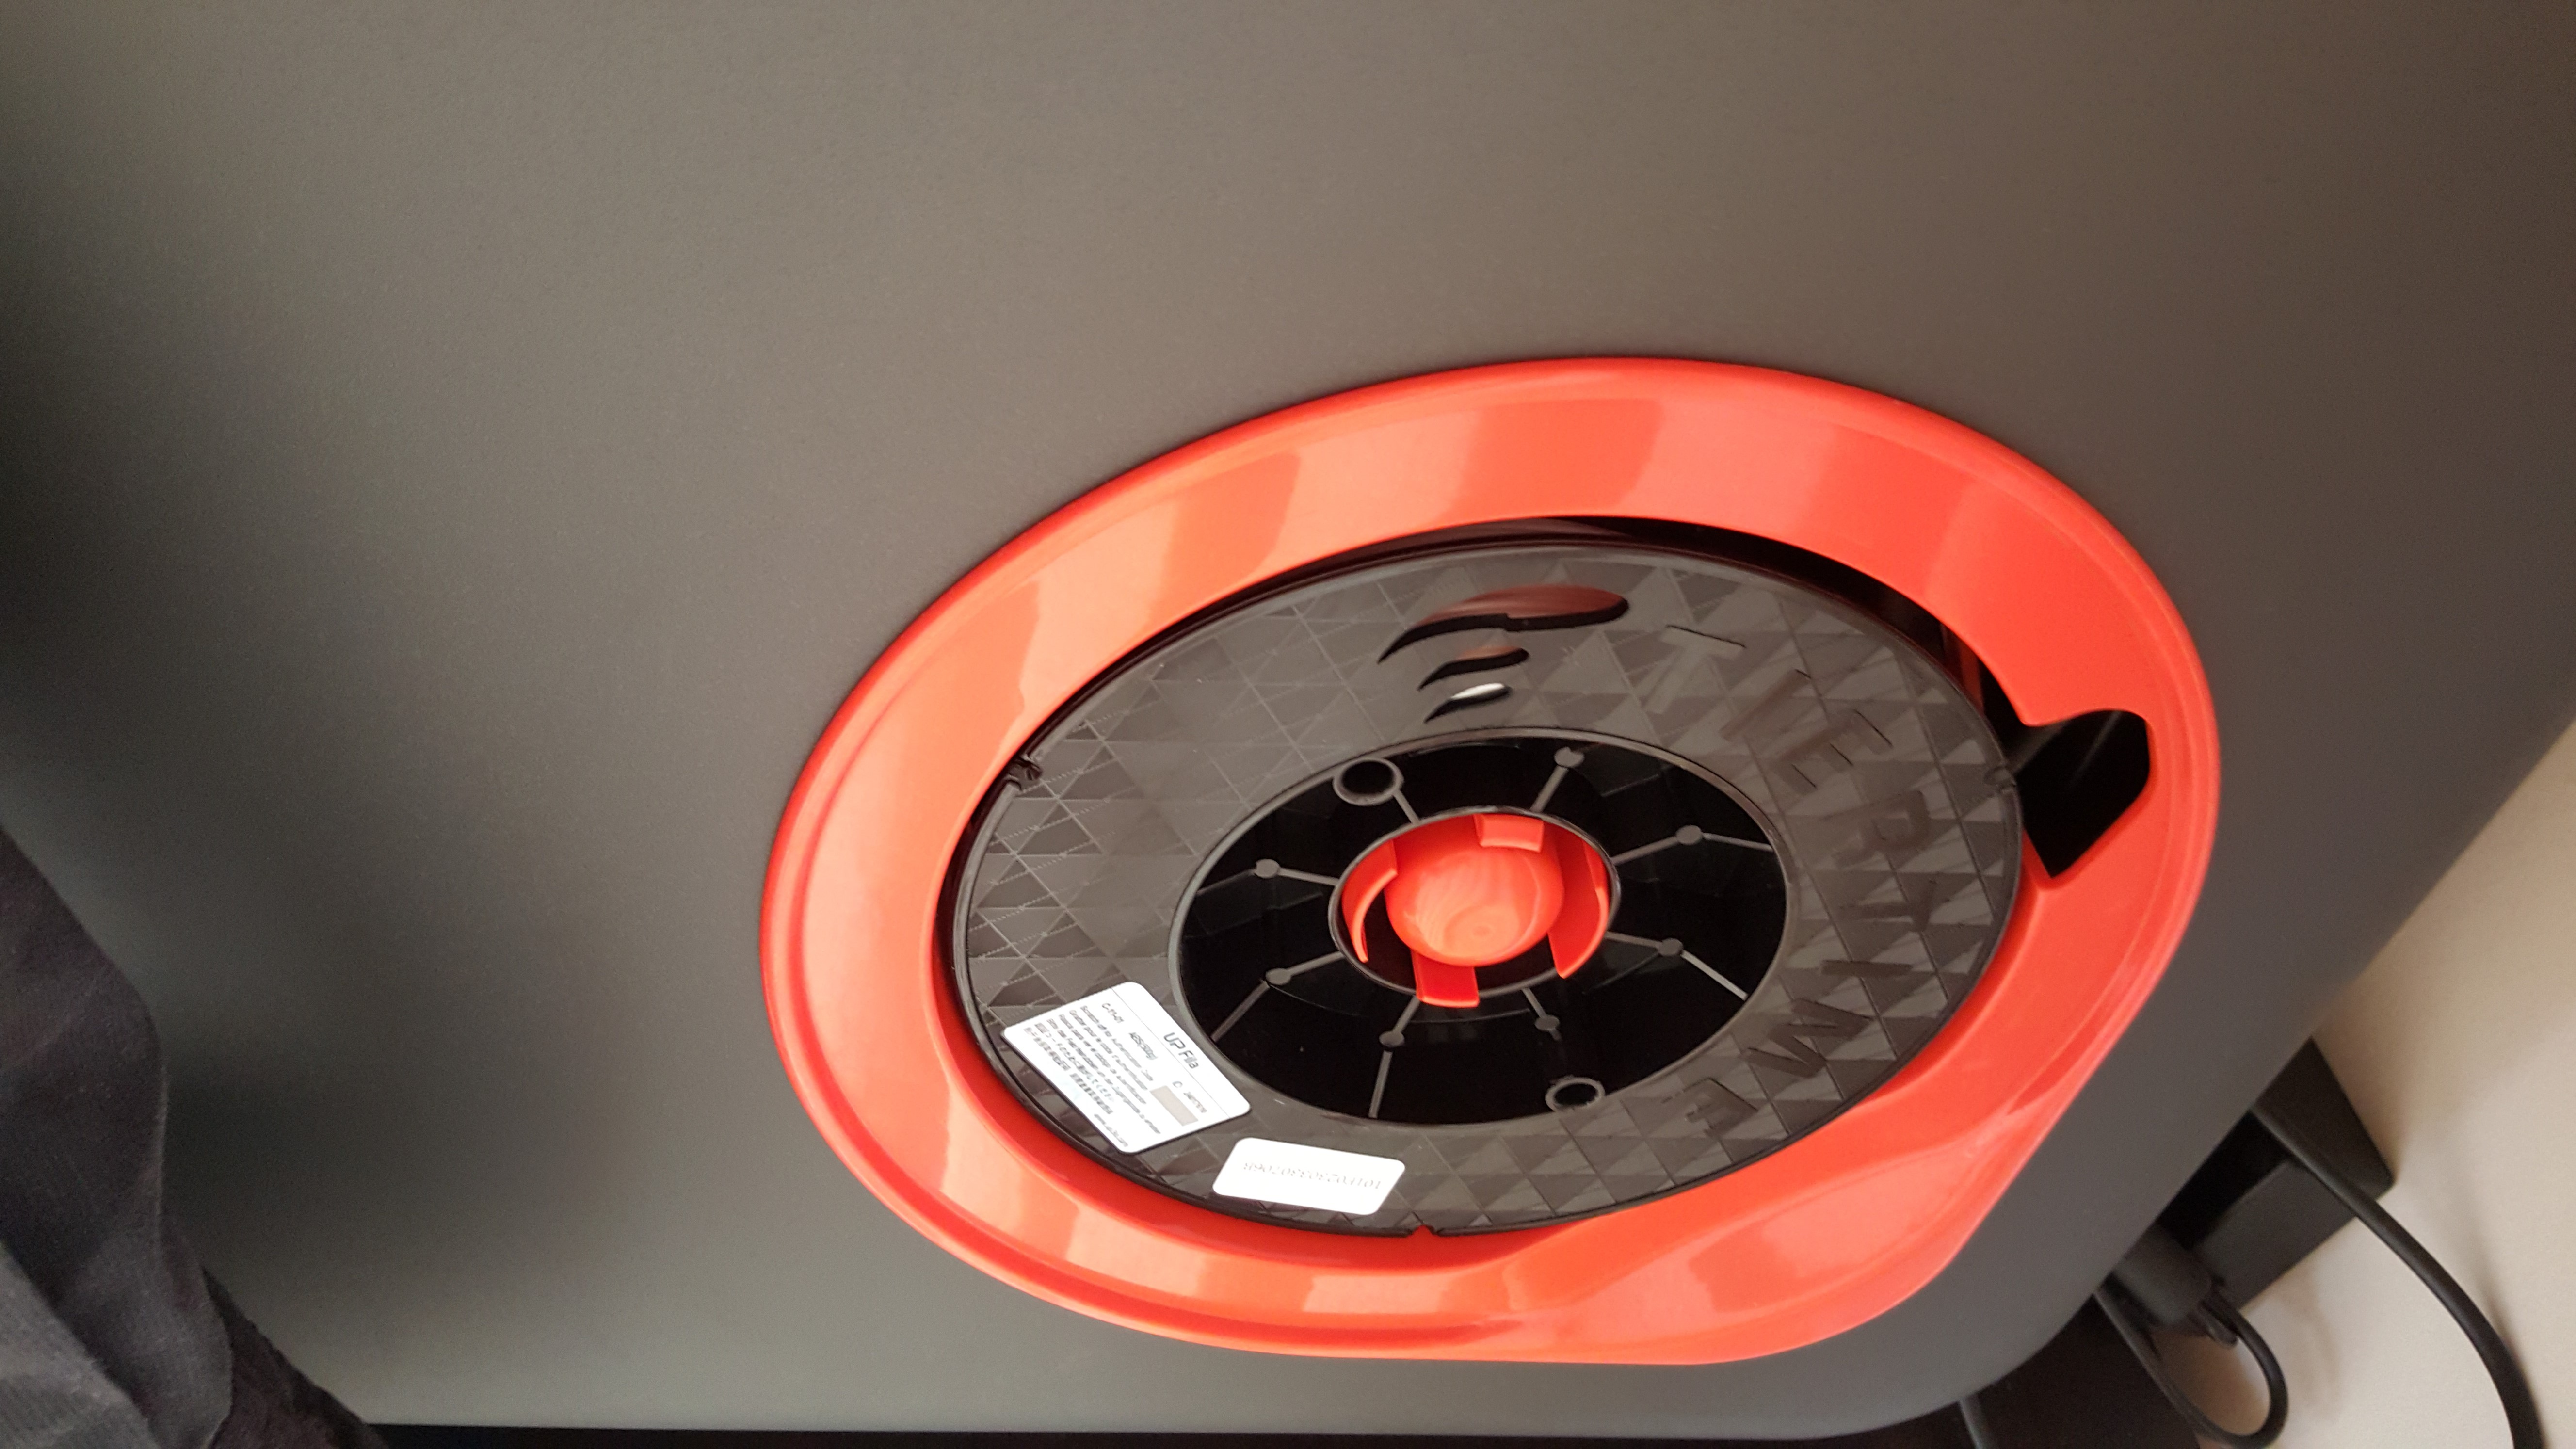
The side of the printer contains a fancy spool holder with magnetic clip, it does look pretty I have to admit.
Unfortunately, the only thing going for it is ‘pretty’ as the filament spool size is truly underwhelming at 500g. I am not looking forward to swapping filaments in-between large prints, but for those who do multiple small prints this shouldn’t be an issue.
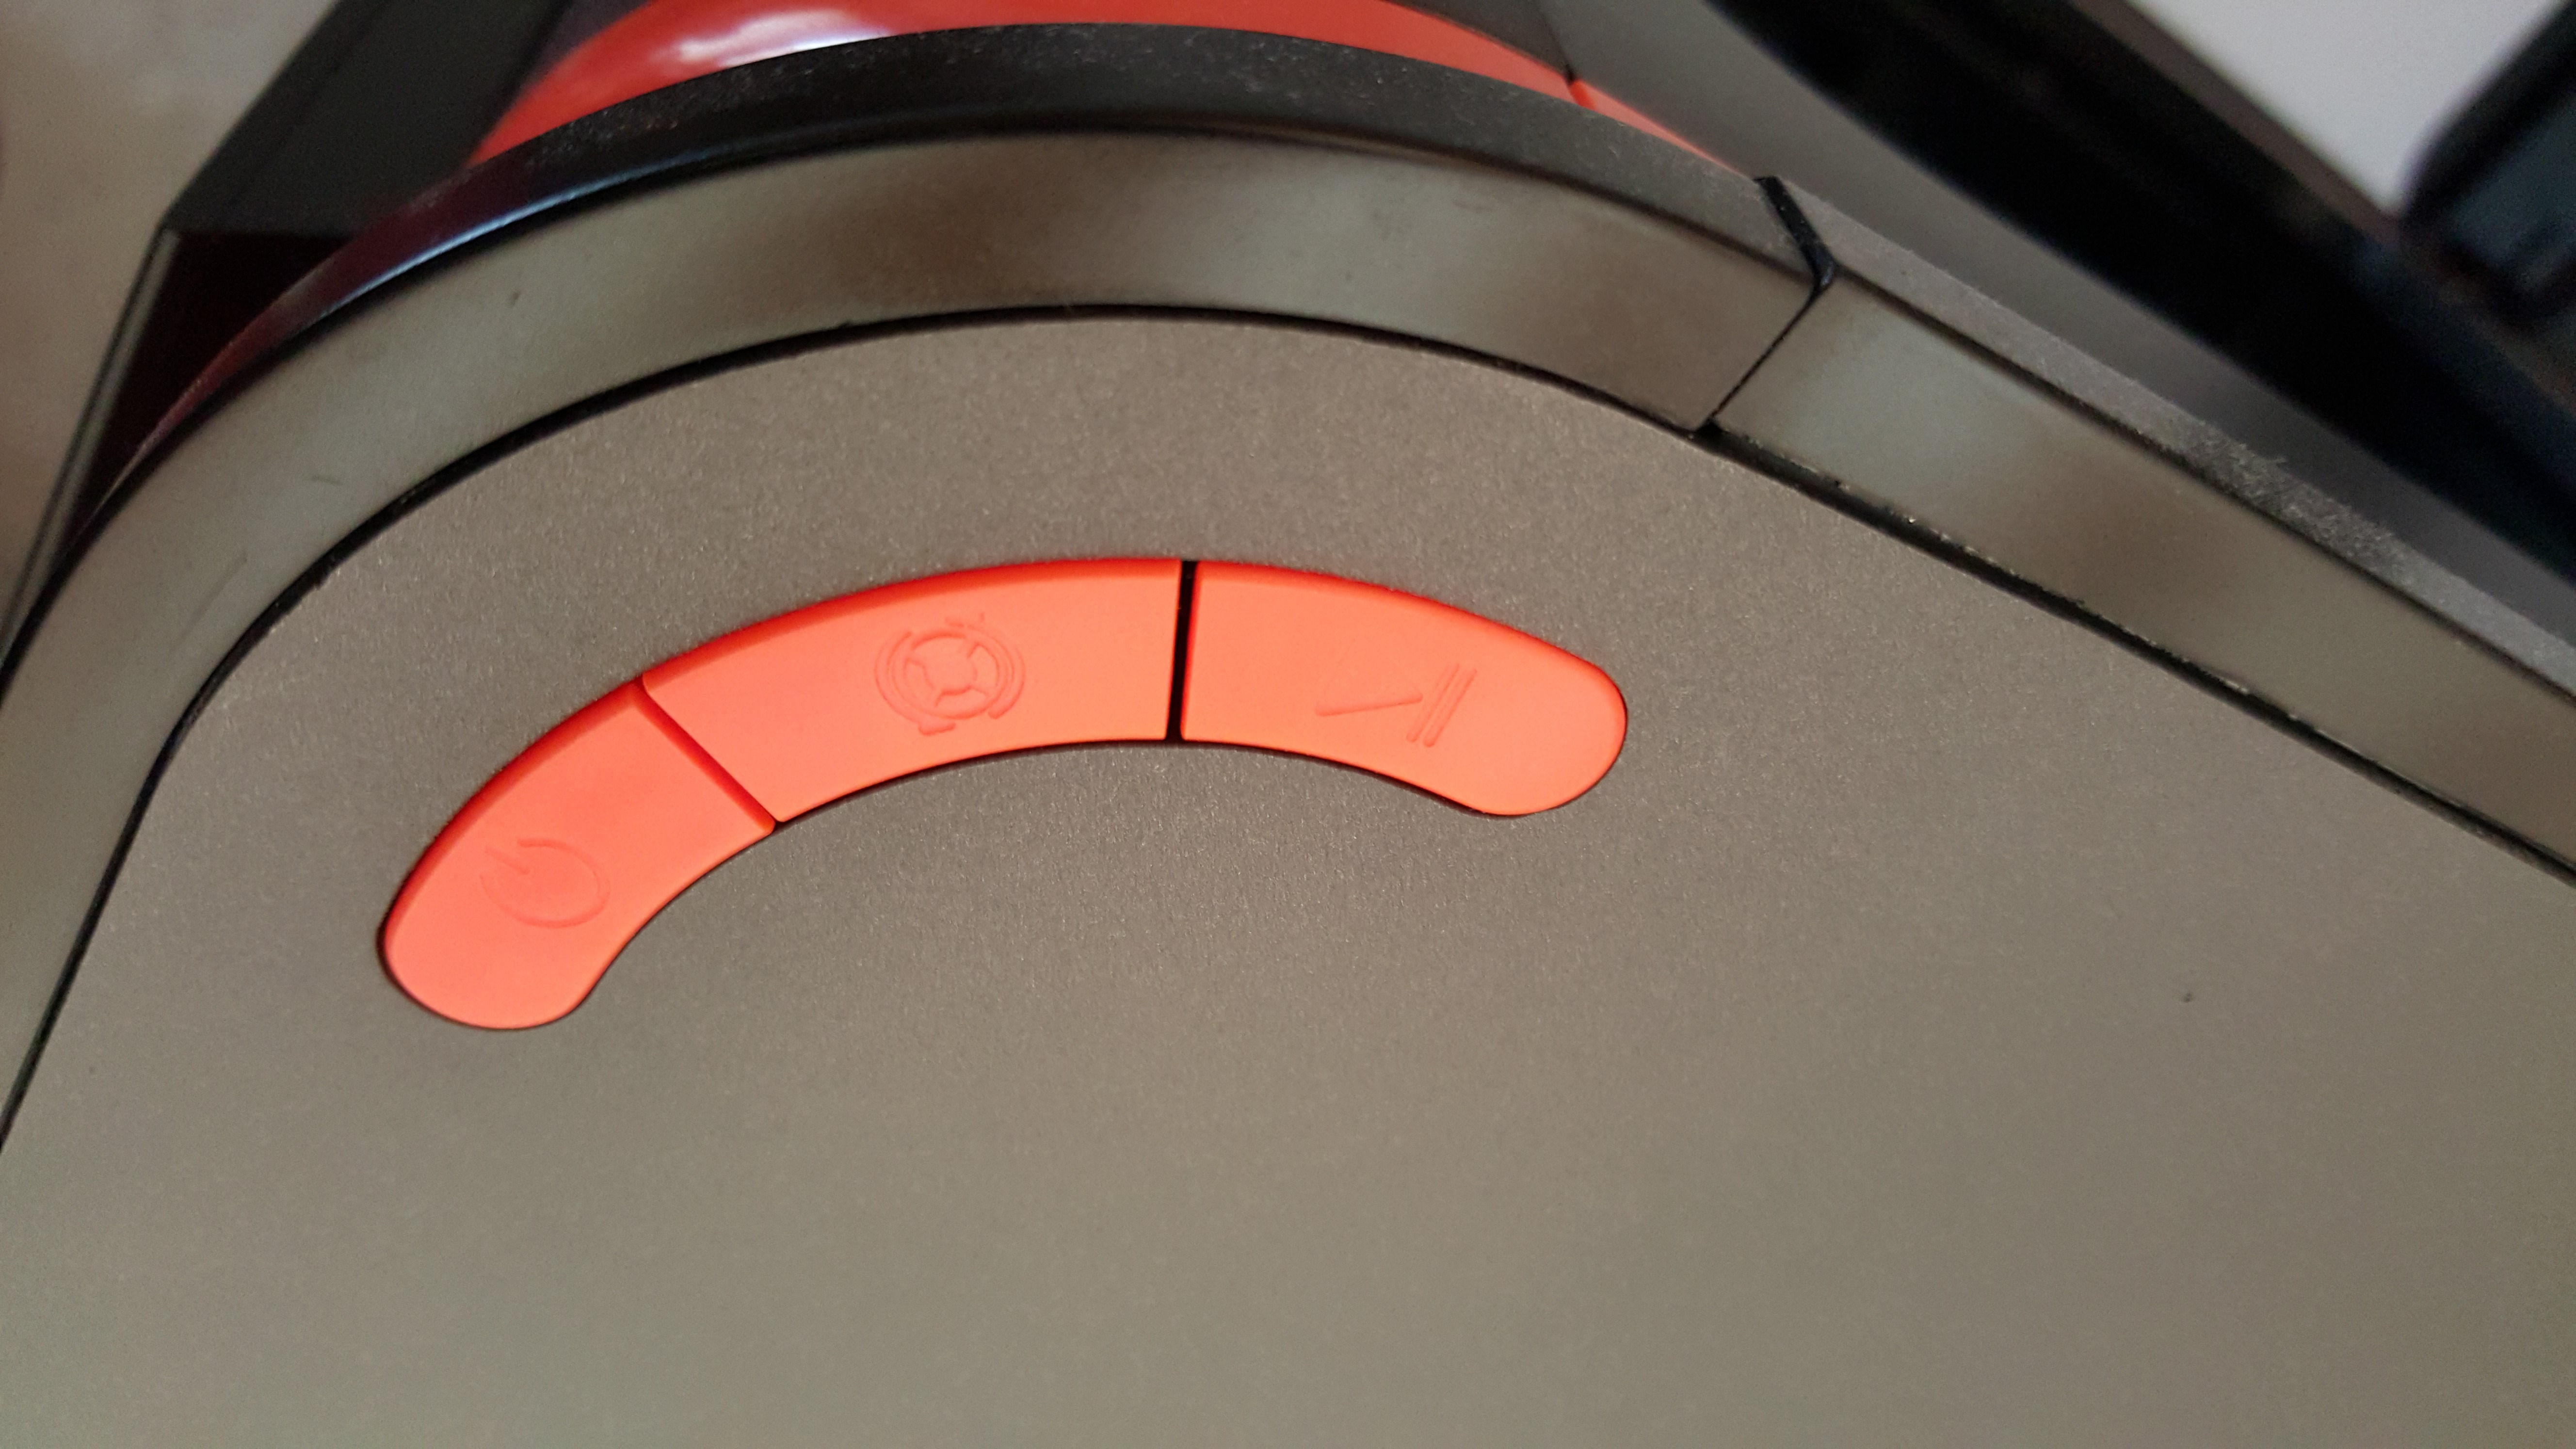
The top right of the box holds 3 multi-function buttons depending on how long you press them. Functions available include pre-heat, re-print last job, withdraw and extrude filament, pause/resume/stop, and my favorite lights on. The Up Mini 2 appears to contain a LCD screen, but to me that’s feature bloat, three buttons seems to do everything I think I’ll need.
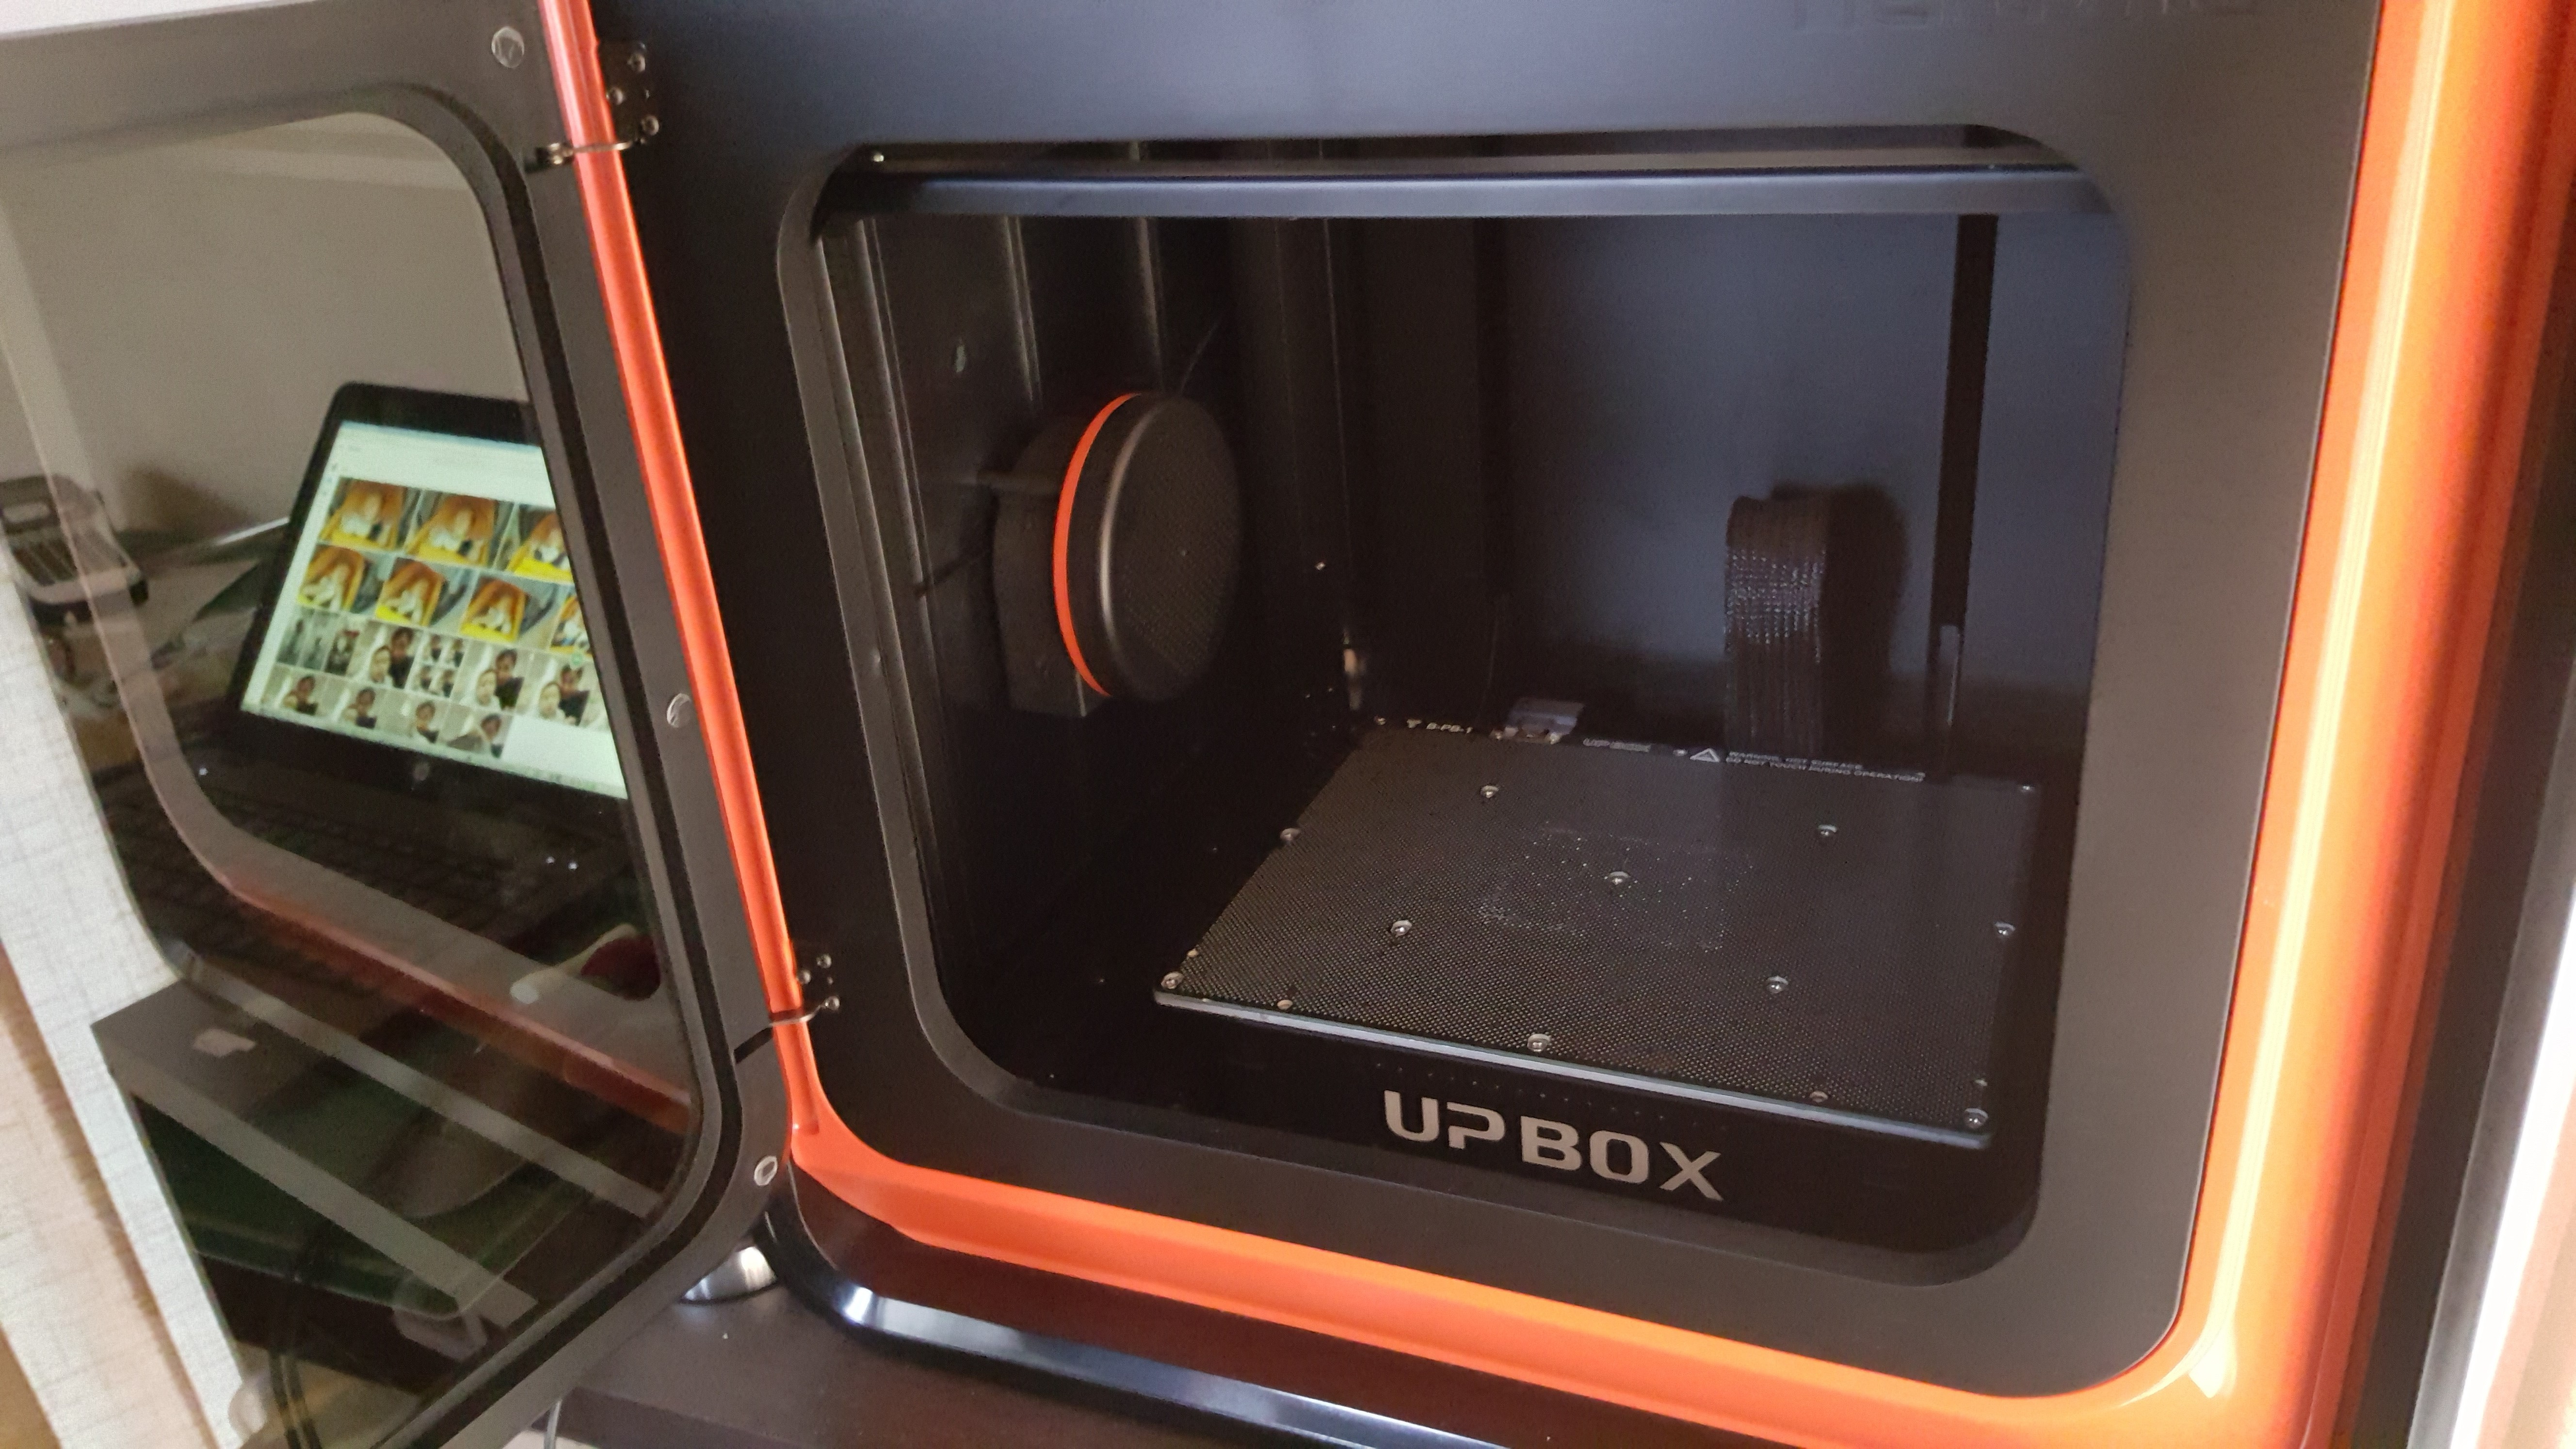
The Up Box has a limit switch on its front door to pause printing whenever it is opened. I think it is intended as a safety feature, but the feature is not included on the top lid presumably assuming kids aren’t that tall. The picture below shows the Box with the front door open and the ABS build plate installed, I really appreciate the professional appearance of the whole set-up.
Printing
The Up Box prints slightly quieter than the Up Plus, probably due to its construction. There is no noticeable improvement on the quality of the prints to its predecessor, but they were pretty damn good already. Probably the one true reason to upgrade to the Up Box if you’ve already have an Up Plus would be for the significantly larger print volume and the ability to print bigger parts without warping.
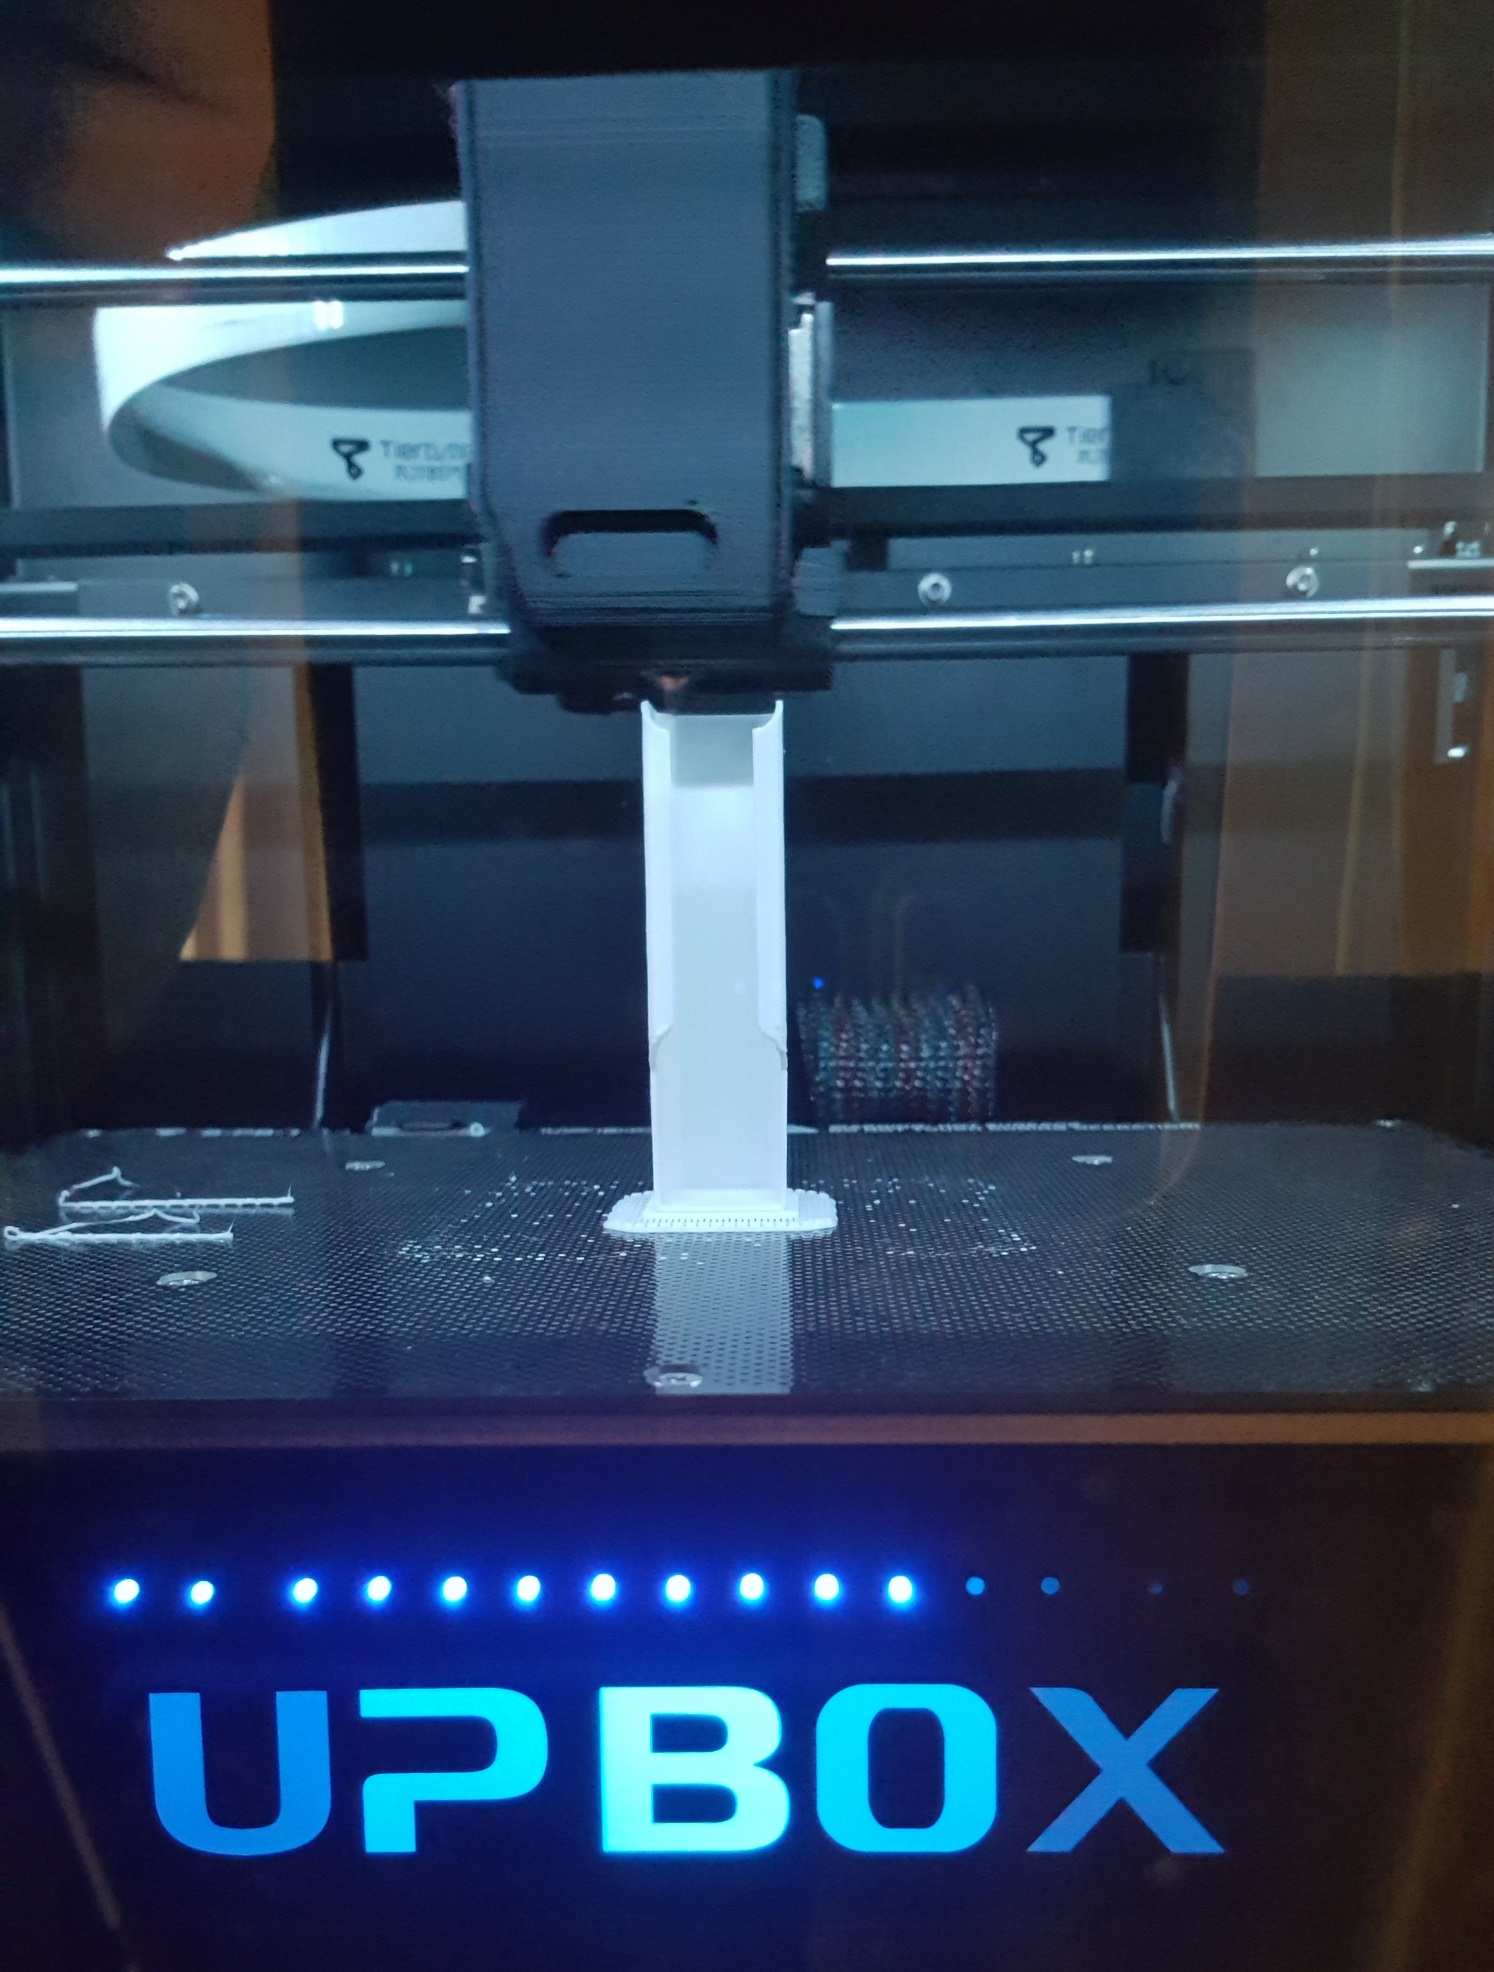
One nice improvement over the Up Mini is that the front window is now much more transparent and with the LED lighting within lets you see the print rather well. The photo below was taken through the front window, it is still rather reflective but you can see everything going on inside well and removes that ‘has my print screwed up’ angst that I had when I was trying to use the Up Mini.
A word of warning though, the bed auto-leveling and height adjustment should be verified! Do not rely on it! Or pre-heat your bed before doing the adjustments. I had a series of bad prints initially but sorted it out after manual adjustments, the variation to the initial auto adjustment values and my own manual adjustment values were very far off. It has been smooth printing every since.
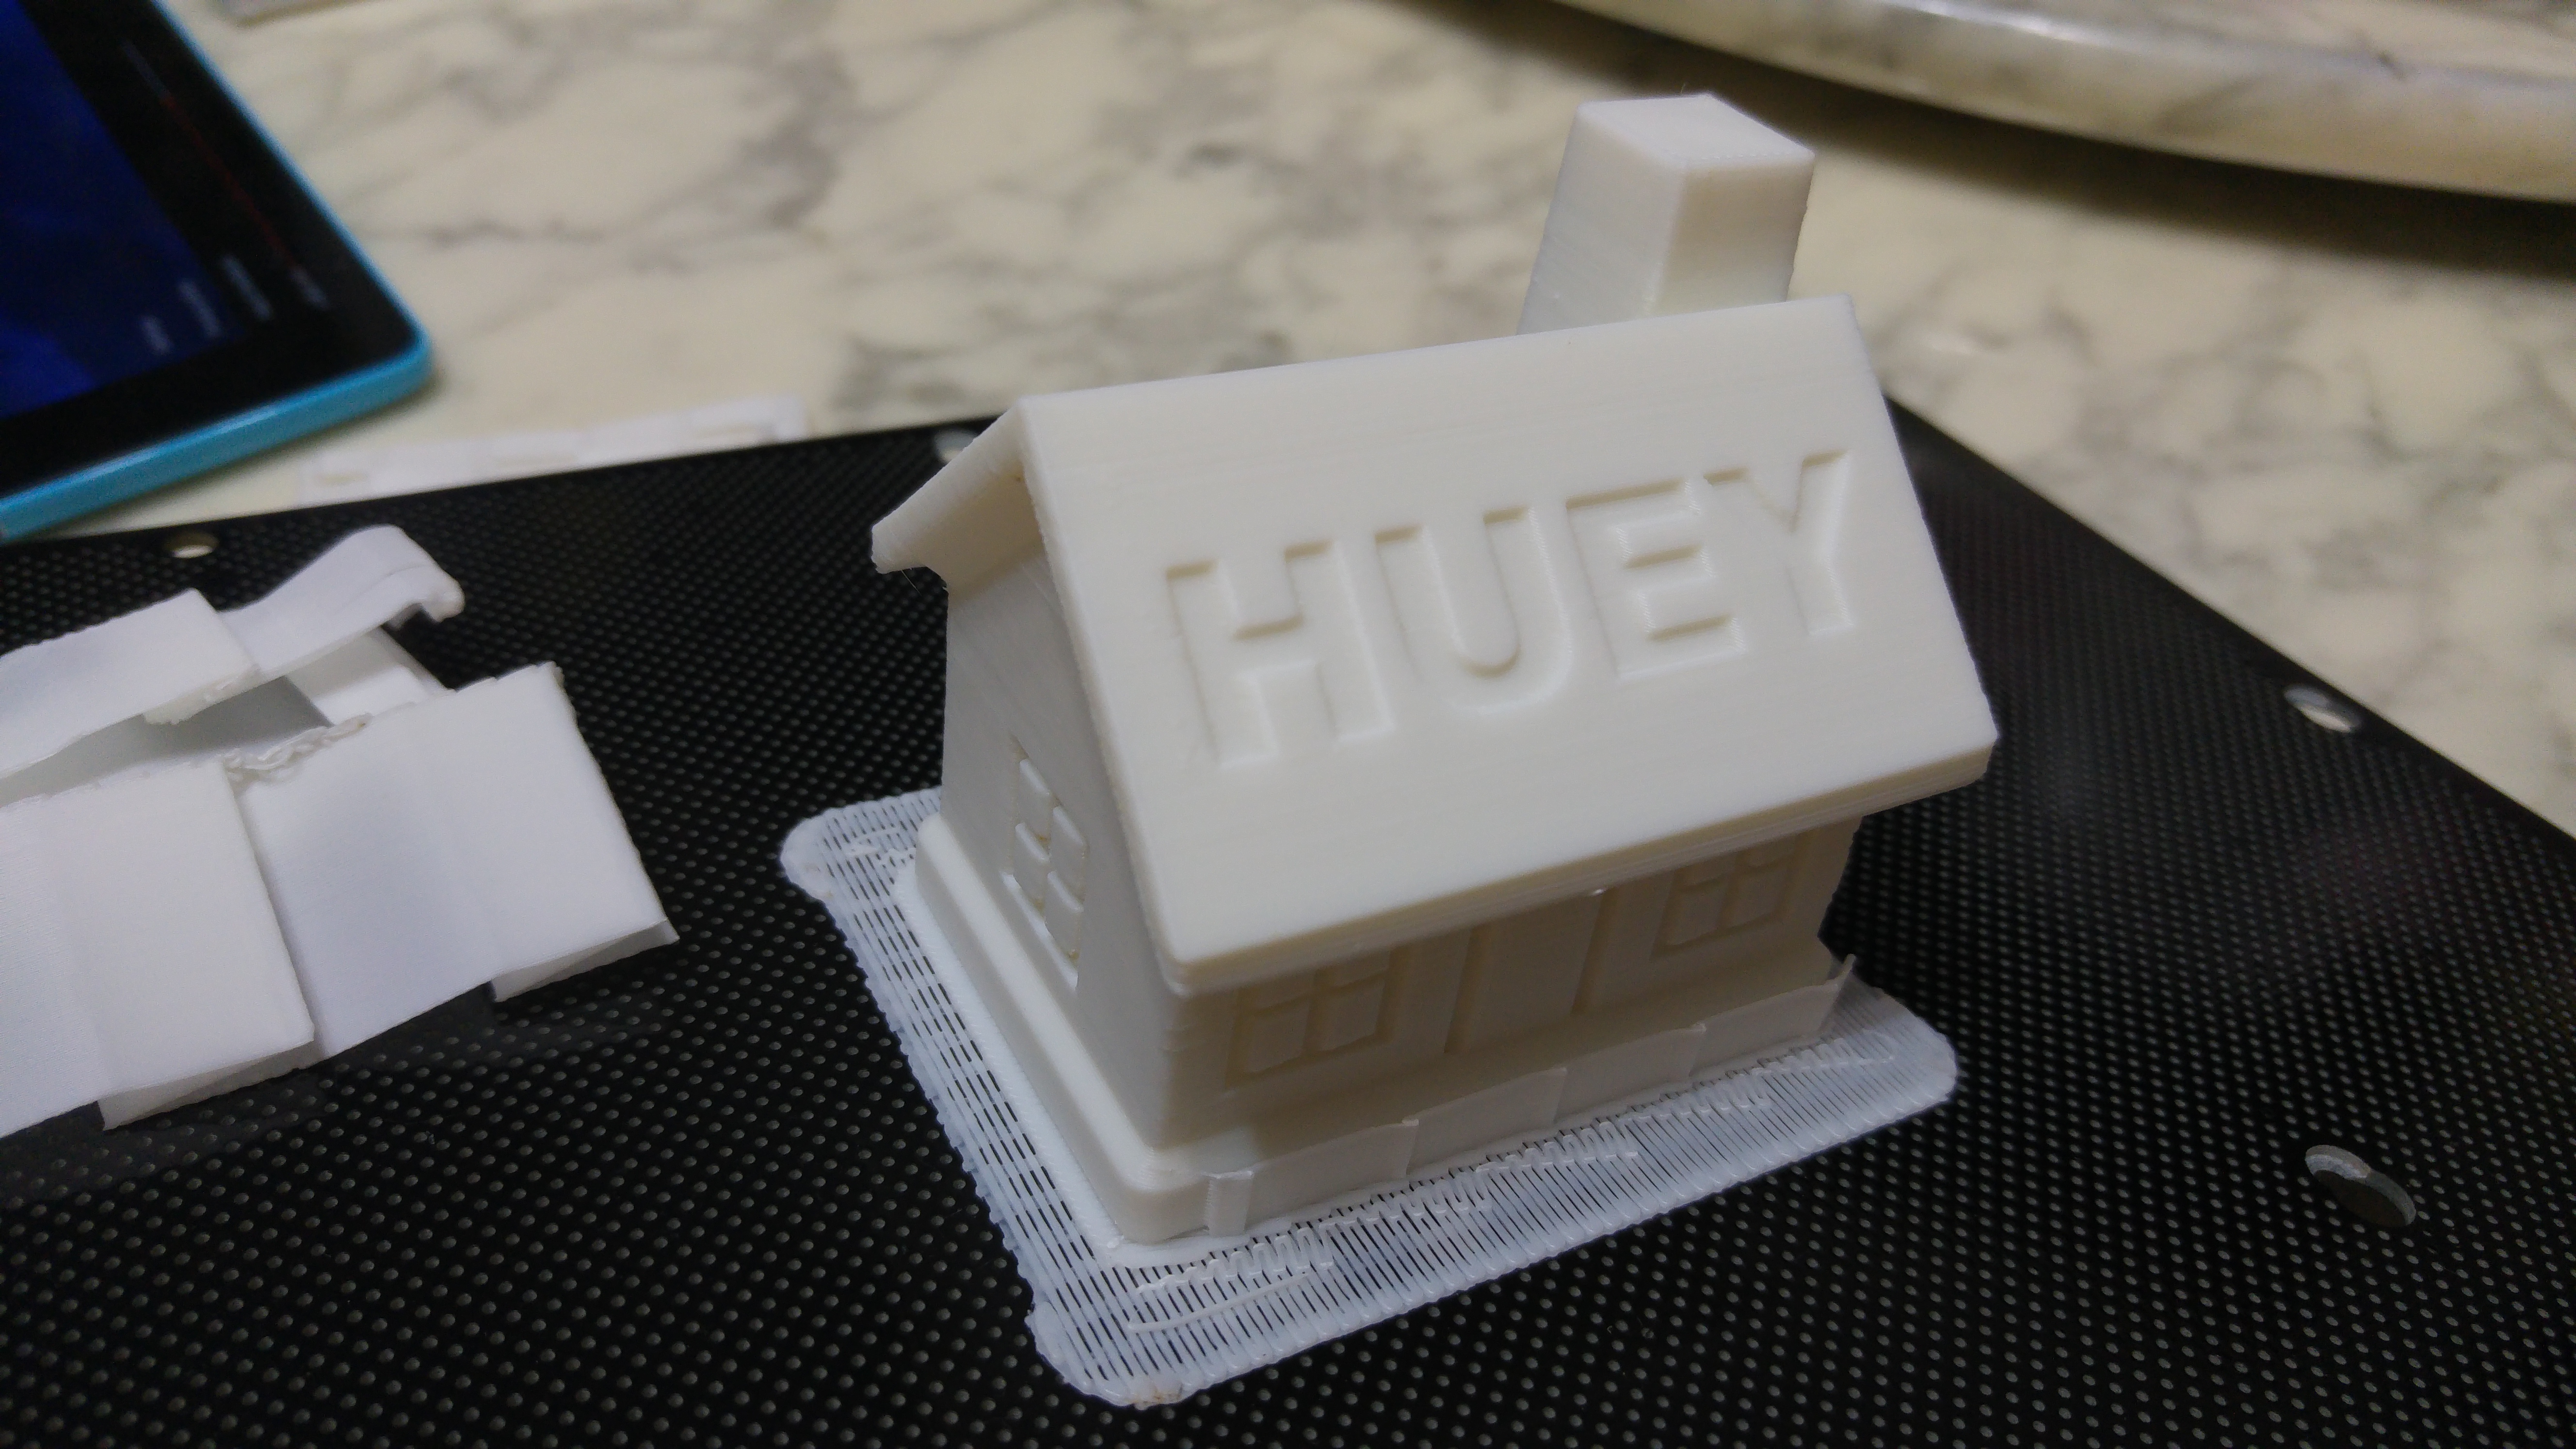
Some random prints I’ve done
With reference to my opening excuse, I haven’t had much time to do much 3D printing (in fact I wrote that excuse a week ago, I’ve been sick since!), so I’ve only got a couple of examples of what I’ve printed with the Box. The support pulls off nicely and all is good 🙂
Should you buy it? (Short Answer)
Short answer – Yes, but you should use this link – Up Box 3D Printer.
Should you buy it? (Longer Answers)
Yes – Professionals, hobbyists and business use
Yes if you need to print functional items and don’t want the hassle of tuning/tweaking/fault finding or any of the myriad of problems associated with cheap 3D printers and 3D printer kits. The higher price is well worth the time and frustration saved if you’re planning on using it for personal projects, and definitely worth the investment if you’re buying it from a company perspective (plus its an expense, its a deduction!).
Maybe – Schools, parents
If you’re a school or educational institution, you may get more bang for your buck with the Up Mini or the upcoming Up Mini 2. Having more printers per student outweighs the large print volume the Up Box brings in my opinion.
If you’re a parent thinking the HEPA filter will let you print in piece, then chalk it down as a maybe. There are so many holes and crevices I’m not sure the HEPA filter does much. You should consider getting a carbon activated filter unit to remove the smell and definitely print in a separate well ventilated room away from your children. I am not an expert but I consider 3D printer emissions in the same category as smoke, i.e. increases SIDS risks. Can’t be certain but caution is good.
No – People learning on building or on a tight budget
If you’re a hobbyist/student and building the printer is part of the learning experience. Personally, I think many of the kits out there will set you for disappointment. Do some research and don’t simply go for the cheapest.
The almost $3000 price tag may place it out of reach for many people. Instead of buying a cheap 3D printer kit, I suggest to you to look into services such as Shapeways. They offer an excellent service and for several prints a year, they’re cheaper than owning a 3D printer.
The people who sell the Tiertime Up printers in Australia also have a 3D printing service locally, I think it is http://3dprint-au.com/ but I’ve not tried it out yet…