The Cute Exterminator is another demonstration project using the TP-Link TL-WR703N router to create a WiFi enabled remote control toy. It shows how the router can be used to control servos with minimal programming other than with html/javascript and a single line of shell script.
Again (well I repeat this a lot), not a comprehensive write up because it was a quick a dirty build but read on for the short description and a visual walk-through.
Concept
Robots & Dinosaurs (the Sydney Hackerspace) is co-located with the Sydney Robot Workshop, or to cut to the point, there are A LOT of Daleks there! I loved Doctor Who as a kid but building a large life size replica of a Dalek seemed a bit too hard for lazy me. eBay fluffy Dalek to the rescue!
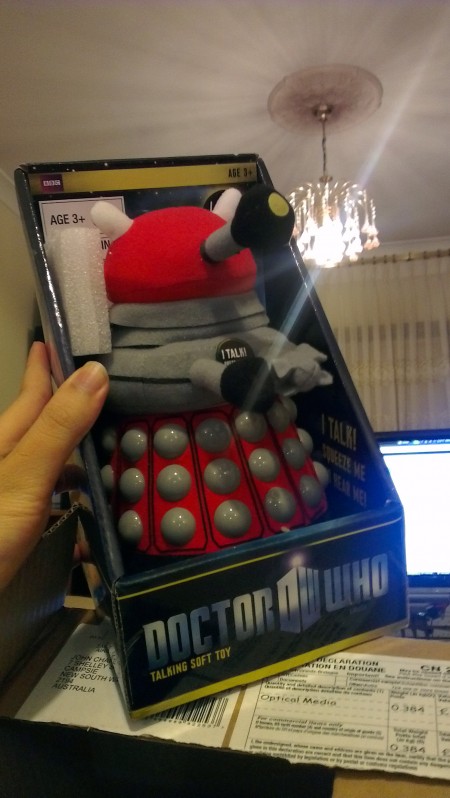
It is a decent size and only costs around $25 including shipping, should fit a router! Cute little bugger, there’s even a BONUS! Recorded voice module! Win!
The hacking
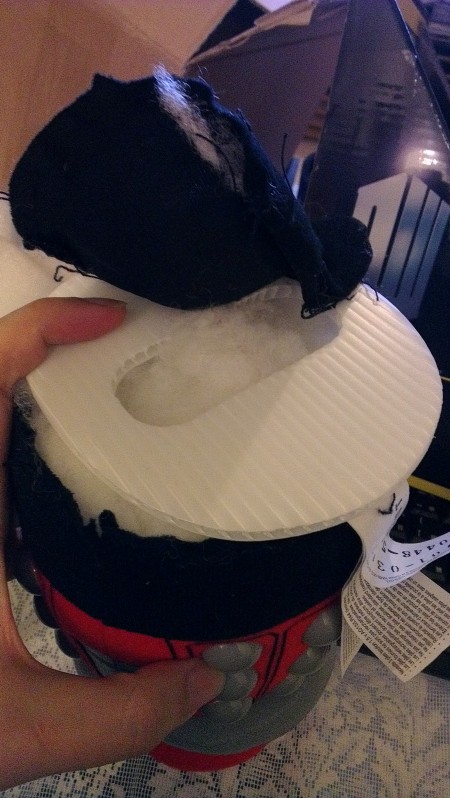
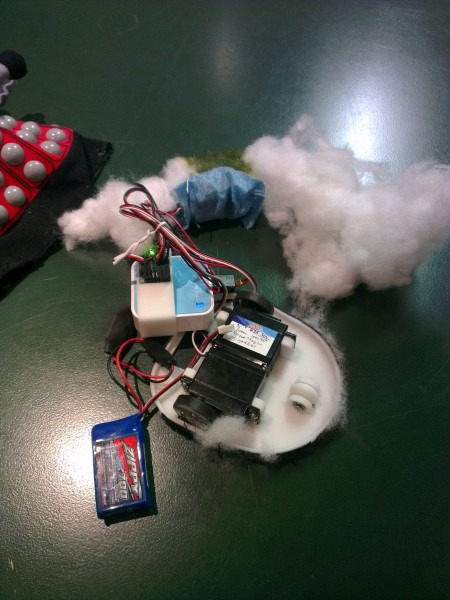
Ripping apart a plush Dalek isn’t as emotionally challenging as tearing apart a teddy bear. Using some sewing tools to remove the thread is handy so you don’t have to incise into the toy. I pulled out the battery holder so I knew where the wires were, just in case.
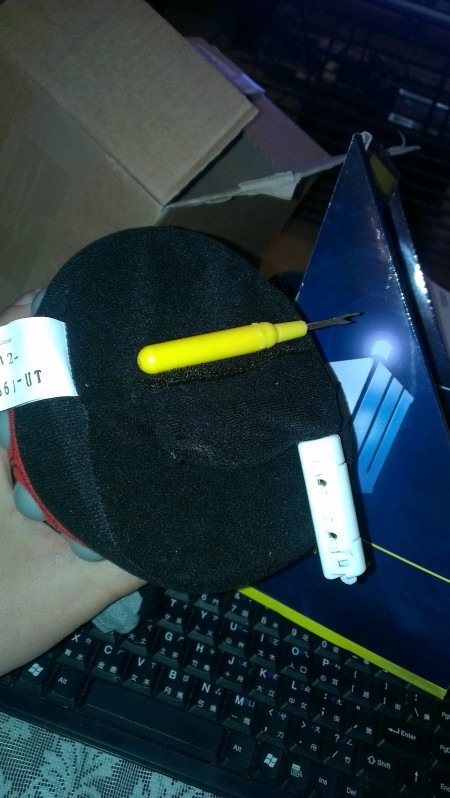
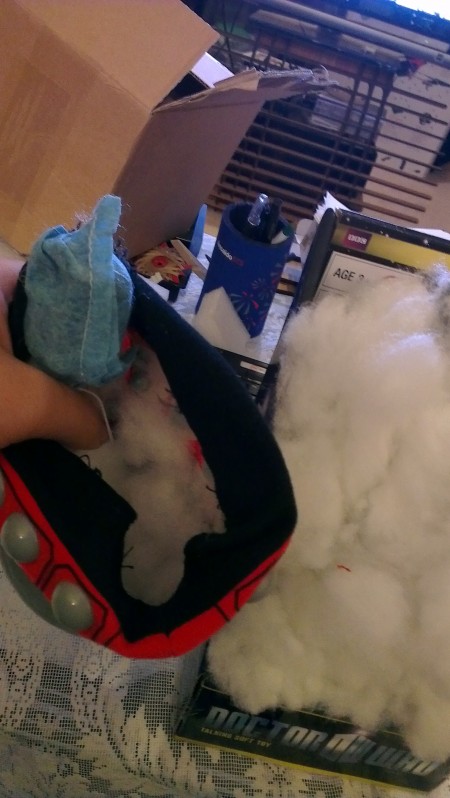
Digging into the fluffy Dalek reveals the inner workings. It is basically comprised of a battery module, a switch for activating the voice and a voice module that integrates the speaker wrapped in the blue cover pictured below. Of course there is a lot of stuffing as well!
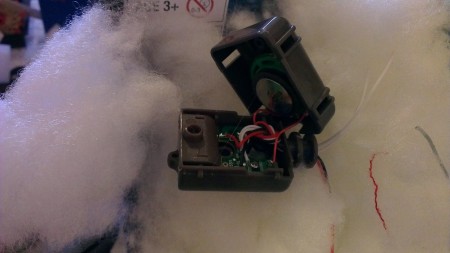
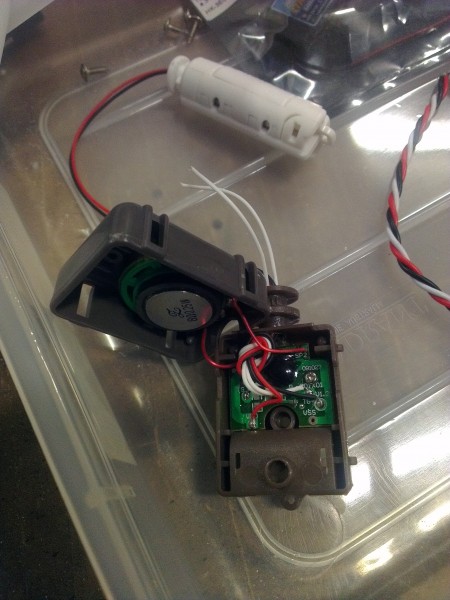
Since we’re hacking though, we need to go deeper (no Inception jokes thanks) and see how the voice module ticks. Luckily it is very easy to pry apart with a small flat screwdriver and inside shows a small speaker wired up to a PCB. Surprisingly for something that is off a mass produced toy, the PCB is extremely well labelled.
Now that we can see all the apparently simple innards, we need to figure out how it ticks. A common mistake that many people make when they take things apart to learn how they work is that… well they take it apart. The easiest way to understand how something works is to keep it in working order and observe it working. In the case of the Dalek, I kept all wiring in place and and measured across various points as I squeezed the Dalek to make it squeal.
The two wires coming in from the battery were obvious starting points and measured 4.75V. Great, this will go well with the USB 5V power of the router.
The ‘switch’ that activates the voice module should be a simple normally open contact based on assumption. What assumption? It is probably safe to assume that whatever you buy that is made in China is made as cheap as possible. Which leads to the next question what does the switch do? The switch comes in via two white wires and with a multimeter we can simply measure each wire with reference to the ground or black wire from the battery. We take a set of measurements with the switch in its normal state, as well as when it is ‘squeezed’. What do we find? We find that the switch pulls low a 4.75 voltage to active the voice module.
i.e. to activate the voice module, we need to pull the “TG” pin near the VCC/+ve (red wire) low. One of the simplest ways to effect this voice module is to use an open collector output.
The electronics
Now that the Dalek has been hacked open and its inner workings deciphered, we can try figure out what components we need to make it a remote control toy.
So the electronics include :-
- Brains – TP-Link TL-WR703N Router [eBay?] ~$20
- Locomotion – 2 x Continuous Rotation Servos ~$3.40ea
- Interface – Pololu Maestro 6 USB Servo Controller ~$20 (Or ~$28 from LittleBirdElectronics in Aus)
- Battery – Zippy 6.6V 700mA LiFePO4 ~$2.70
- Power Regulator – HobbyKing 3A / 5V UBEC ~$3.70
- The fluffy Dalek and its innards of course…
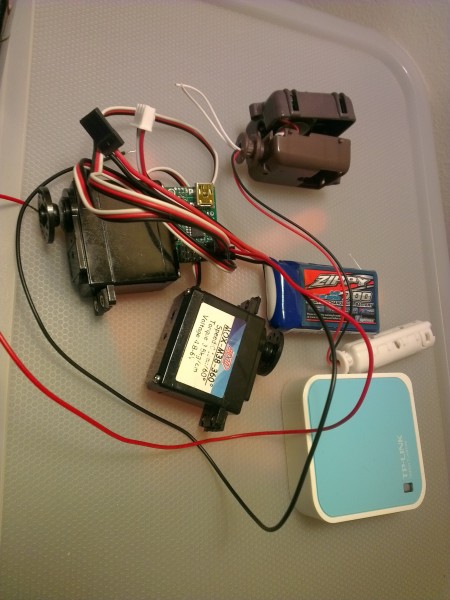
The Pololu Maestro 6 USB Servo controller is really good because it is USB controlled via a simple serial interface and the outputs are configurable so that one channel can be used as a general purpose output, which conveniently able to drive the voice module. Like in the previous example project, I found the HobbyKing UBECs to be extremely good value for money and their small package is an added bonus.
The mechanicals
Since I have a 3D printer at home, replacing the ‘base’ of the Dalek was relatively easy.
<Shameless Plug>
If you’re interested in a 3D printer and you’re in Oceania (Australia/New Zealand), please consider buying the Up! printer using my Affiliate Code Here [seriously!]
</Shameless Plug>
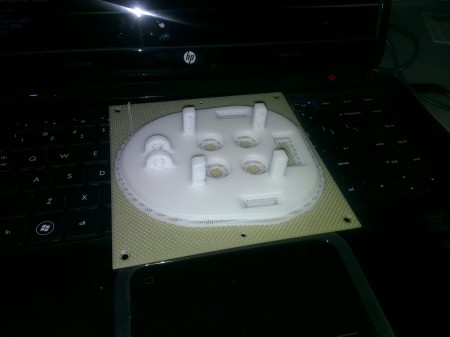
Easy isn’t necessarily without pain and I think I’ve said before that having access to rapid prototyping tools like a 3D printer at home just lets you make mistakes quicker! Yup that’s right, the wheels don’t fit through the base plate.
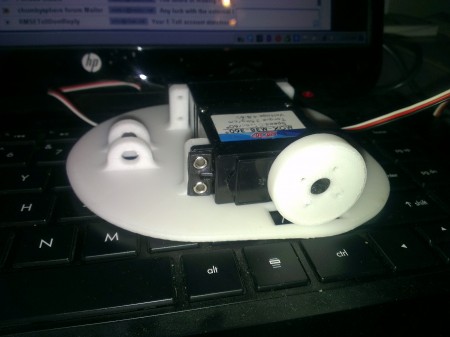
Yup, definitely screwed up the holes in the base for the wheels but the little mount for the Maestro 6 to sit on the router looks nice though.
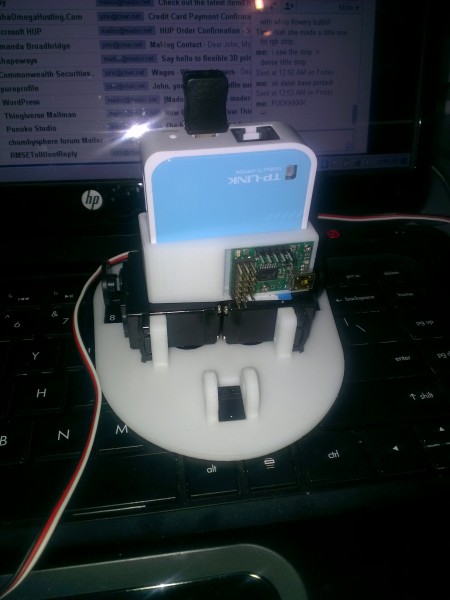
Making mistakes quick is a good thing though, now that I have a defective base it is relatively easy to measure how ‘wrong’ I was on the measurements and adjust. A short while later on the printer, everything fits! Notice the black on the printed wheels, this is plasti-dip to improve traction. The unpowered roller is also 3D printed held on by two M3 countersunk screws from each side mounted on flanged 3x6x2.5 bearings (rotates real nicely). Strips of Velcro (the hook bits) is attached to the sides of the base to ‘stick’ onto the fabric sides of the Dalek.
The software
I have used the Pololu Maestro servo controllers before for the mecanum wheel rovers but I use a Python script there to construct and send the appropriate commands as there is some ‘funky’ encoding required as the commands as binary and in 7 bits etc etc. I didn’t want to have additional hardware components like an USB disk just so I can install Python so I had to brain storm what I could do. I wondered if I could do everything in Javascript (knowing full well that this thought could start a comment flame war…)?
It turns out that it is feasible to do it all in Javascript, the trick is passing the serial data that needs to be sent out as urlencoded parameters to effectively a single line script on the router. That script is :-
#!/bin/sh
#This script decodes a url encoded query string and sends it to ttyACM0
printf $(echo $QUERY_STRING | sed -e 's/%/\\x/g') >> /dev/ttyACM0
All it does is convert whatever query string is received from urlencoding back to binary, and send it straight out the serial port (the Maestro attaches as ttyACM0). Neat eh?
The control interface is written in HTML/Javascript, where most of the code is adapted from the mecanum wheel rover. The control is pretty simple and should be self explanatory.
Another tip for the budding hacker is to test your software before you put everything together! It is very important, you wouldn’t want your robot to run away or you taking apart something you just painfully assembled.
The software used in this example project is available here :- cutex_2012-08-13.
To “install”,
- Create directory /www/cutex/
- Copy index.html to /www/cutex/
- Copy ‘serial.sh’ into /www/cgi-bin
- Make sure serial.sh is executable ( ‘chmod +x serial.sh’)
To “play”,
Connect to the router, browse to the control page e.g. “http://192.168.1.1/cutex/”
- Initial ‘touch’/’press’ down sets the starting point,
- Move the cursor/touch up to go forward
- Move the cursor/touch down to go backward
- Move the cursor/touch left/right to rotate
- Exterminate button activates the voice module
- Note, there is some issue with the latest webkit browsers like Chrome for this button… I didn’t bother to look into it, use Dolphin HD if you’re using Android.
Enjoy!
Note : You don’t really need to use a plush toy for this project 🙂 It was just cute 🙂
Can this method be combined with a USB hub for use with other tech such as webcams, etc? Or does the script need complete access to the sole USB slot?
Hi Corvair,
There should be no problem, I actually bought a small slim webcam to see if I can squeeze into the stalk of the Dalek.
Is it possible to use any router for this project ? I have an old netgear wgr614 v9 router l want to use along with a cross platform html5 controller for the motion. Can you provide a detailed tutorial so i can get an idea on how to get started with connecting the servo to the router (my router has no usb port just Ethernet) to my remote control device (tablet or phone).or can you show me where to find resources to learn?
If you’re camera doesn’t work, this one from Jaycar might. I wish they had more info, so I could see if it’s linux compatible.
http://www.jaycar.com.au/productView.asp?ID=QC3383
I have a very similar one from eBay that’s much cheaper and it works with the router 😛
Just never gotten around to it…
Hey There!!!
I’m interested in developing a project similar to this by way of cross-platform development (JavaScript, HTML, CSS) I wanna be able to control my device on any device with a wifi signal and an internet browser. I’m new to JavaScript, I’m really a C# head. Was using JavaScript a daunting task and I wanna know if it was a complicated language to learn compared to C#? I dont think I wanna do like a robot but something in the area of a helicopter with a camera. But if you could direct me in the right place to find the right learning resources for this type of project and the best outlet for learning JavaScript. I have an old router I don’t use any more and I wanna know how to put it in use.
Thank You!!!
is there anyway you can post the code you used for this project just to give me an idea on how to set up my own project and also did you use linux for this? how? I just need some direction.
Please help!!!
Hi, I posted all the source code in the post above already…?
could this be adapted to use standard dc motors instead? using pololu’s dc motor controllers? would the code still be the same?
Sure, I don’t see why not. I just had a bunch of continuous servos and spare pololu servo controllers 😉
hey im am trying to use your example i have changed it a bit, but when im trying to send something to serial.sh i got an 502 (Bad Gateway) error any idea ? by the way thanks for the article and for the image for tp link 703n (running usbip)
Hi, is the 502 from the router or is it from your home network proxy? 🙂 I can’t really help unless you tell me what you’ve changed but Bad Gateway sounds like it might not be the router… another thing to remind yourself is have you done a chmod +x on the script (very important…might be your problem…)?
hey thanks for getting back to me – the error its from the router (uhttp), most of the changes were done to the web application the bash script was kept almost the same and the script was chmoded
anyway another question – i downloaded your image of openwrt with usbip and its working good but i the kernel version of that image its older so i have tried to install the last snapshot for 703n and install the usbip on the latest snapshot but usbip does not work when i try to call usbip or usbipd it tell me that it cannot find the program – so the question is how did you manage to install usbip on your image ?
thanks,
Vlad
Hi Madox,
Love the site! I’ve got both ser2net and mjpg_streamer working from your great instructions. Just wondering if you’re aware of an alternative to serpent that supports UDP communications instead of TCP?
Thanks again from a fellow Aussie!
James
Hi James –
If you want to use UDP – can you not just use netcat? I believe I did compile the server netcat on the most recent images…
If not, there is lua and luasocket installed already on the images from which you should be able to knock something up…
😛 Sydney-sider?
Thanks Madox,
I’ll look into it! I’m down south near Geelong actually 😉 Robotics Engineer.
Hey Maddox, if your webcam doesn’t work this one looks promising:
http://www.jaycar.com.au/productView.asp?ID=QC3383
Plus there are LEDs built in! Just have to switch them out for blue (near enough to 2 Blue LEDs = 1 White one) (or put a blue lens over them (easier and will probably look beter).
PS – thanks for posting all the info on this router. I orded one on ebay and I’m really looking forward to trying some hacks. A 3D printed Dalek for example =).
Just bought wayyyyyyyy too much stuff from eBay 😛 Will post more router stuff when I get this batch 🙂
Hehe, I know what that’s like. I’m not allowed to browse on ebay at the moment (self imposed ban). Pretty sure I should ban myself on Gumtree too, but if I had I woundn’t have picked up a second hand one of these for $30:
http://www.amazon.com/Tyco-N-S-E-C-T-Robotic-Attack-Creature/dp/B000FBGB2K
Just another addition to my robot army of doom. Now I just need to get them all working. Looking forward to connecting at least one or two to the web as well. =)
I will not be tempted with links! 😛 [Not by that one anyway…]
Hi Maddox, I always thought that the servos were very electrical/mechanical and not so much programmable with html and Java scripts. I am amazed by what you have done. Thanks.
could you post how you wired this up? it looks like it is wireless
I don’t understand how you have the servo controller connected to the tp-link.
thanks! nice project.
Hi, check the article, I’m using a Pololu Maestro USB Servo controller.
Hey Madox,
Just interested in how you have the battery connected? I can’t tell from the photos.
Are you connecting Batt => UBEC => Pololu servo power and then connecting VIN to a servo + on the pololu to power the processor or is the processor being powered by USB off the TP-Link?
How are you powering the TP-Link? Off the UBEC or using the pololu servo pins?