
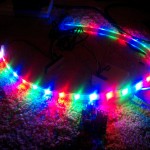
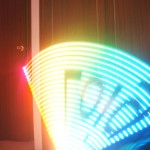
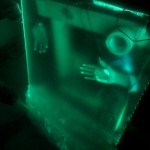
The BitBltBlade is a demonstration project using the TP-Link TL-WR703N router and Kean’s Expander board. It interfaces with a strip of 24 RGB LED’s for generating images superimposed on backgrounds using long exposure photography. It is basically a copy of Gavin’s Lightscythe implemented using different hardware and software.
Again this is not a comprehensive write-up, but a quick example of a TL-WR703N project [it took me 8 months to decide to make it, 1 week to actually make it, and 3 more months to decide to write about it OK! 44 weeks of procrastination for 1 week of work so don’t expect too much!]. Short write-ups for the Cute Exterminator and using the router for remote USBIP will come this week.
Project check list :
- Hack – Using a commercially available router – ✓ Check!
- Cool – Kean’s expander board for customized hacking – ✓ Check!
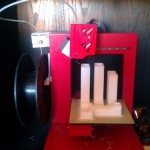
- 3D Printing – Large prints – ✓Check!
- Bling – FLASHING LIGHTS – ✓ Check!
- iPhone controlled – actually no, iPhone doesn’t have a file-system to be able to upload the images – iPhone fail
- Android controlled – Yay – ✓ Check!
- Looks like a lightsaber bonus – ✓ Check!

Design Outline
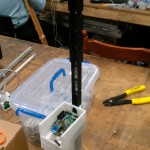
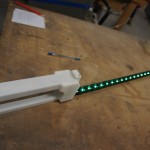
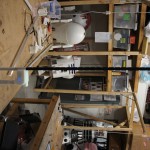
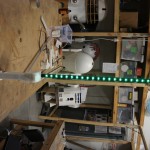
The original idea was to have a 3-metre long light strip just to out-do Gavin, but in the end I decided on a demonstrator that is portable both in size and form factor. A ~66cm length of light strip was used instead, which when mounted on a 1-metre long aluminium U-channel (~$3) created a sturdy ‘sword’ or sabre like appearance. The remaining length of the aluminium channel was designed as the handle, and casing for the various components such as the router and batteries etc was modelled up using 3D CAD software (Alibre).
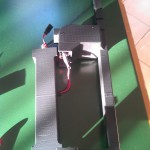
The electronic components include :
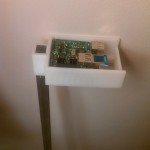
- Brains – TP-Link TL-WR703N Router [eBay?] ~$20
- Interface – Kean’s WR703N Board ~$20
- Output – WS2801 LED strip ~$20/m
- Battery – Zippy 6.6V 2500mA LiFePO4 ~$8.70
- Power Regulator – HobbyKing 3A / 5V UBEC ~$3.70
- Camera Control – IR Toy ~19.50 [Which I’ve misplaced and didn’t end up fitting!]
- Extra USB Storage…

Basic Software
The WS2801 IC’s are designed to operate RGB LEDs and operate basically as a shift register using a minimum delay time to latch the results. This allows for relatively an relatively simple interface using Kean’s Expander Board’s FTDI chip which has an onboard ‘MPSSE’ module, a neat little serial interface.
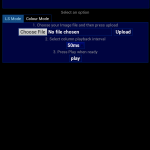
Whilst I could have used the on-board uhttpd and Lua to act as the web interface, I didn’t know how to go about parsing the various image formats I wanted to be able to upload. In the end I decided on Python, and since Python is ‘rather large’, additional USB storage was needed to install it. For the small additional cost (of the USB drive), the ease of using Python and its plethora of libraries was well worth it.
All the required software packages are available either as part of the standard image, or as packages available for download from here.
The additional software packages required are :-
- The Python Imaging Library is used for image rescaling and parsing. Larger images resized to be 24 pixels high (number of LEDs) for display.
- pylibusb is used to interface with the FTDI chip and its MPSSE module.
- pySerial is used to communicate with the IR Toy to use as a camera remote [incomplete].
The rest of the software is based on standard Python libraries such as “BaseHTTPServer”.
As a reference, the software used on the functioning prototype consists of two files and is attached here : bbbcontrol_2012-07-23.
This requires the ‘standard’ image with the above additional packages installed, the router to be configured to act as a WiFi hotspot and optionally “/etc/config/uhttpd” edited to start LuCi on port 8080 [I preferred to have the web interface on standard port 80 so I didn’t have to keep typing it]. To install, copy the two files onto say “/www” and run “cd /www;python bbbcontrol.py &” on startup (you can do this in LuCi).
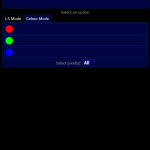
Usage should be self explanatory 🙂
Catches and Tricks
- Just because the WS2801 datasheet has example RGB for the channels, doesn’t mean your light strip will be wired up the same way. My strip had the Blue and Red channels ‘swapped’.
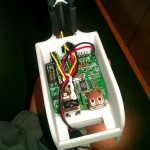
- In case you can’t figure it out, these are electrical connections from the LED strip to Kean’s Expander Board
DO -> (TDI/DO) -> ADBUS1 -> RXI
CLK -> (TCK/SK) -> ADBUS0 -> TXO
GND -> GND
- There’s also a trick for powering the router from Kean’s board [Use trick at own risk… wait we’re voiding warranties anyway…] – On the router, bridge the pads labelled R113. On Kean’s board, bridge JMP2 all the way across. You can now power the expansion board and router via a nice header on Kean’s board!

Excellent write up!
Looking forward to seeing Cute Exterminator details so I can make mine 🙂