Failures are educational and they should be shared with the world. Too often you see awesome projects on the Internet and wonder ‘How did he do that?’ but rarely do you see the failures behind these projects.
I’m planning an ‘educational’ project currently code-named ‘Madox-Kart’ that I’ll get around to writing about, the summary is that it is a educational and fun project for kids to make programmable RC cars on the cheap (<$25) to teach electronics and 3D printing. To test out the concept, I decided to make a prototype.
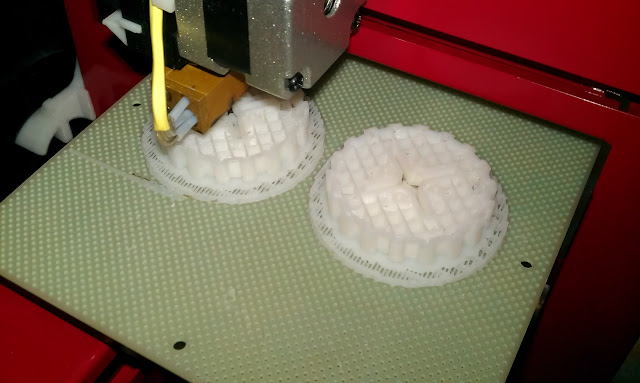
Prototype was ‘quick and dirty’ and looks something like :-
It took a few hours to print because I printed at 0.2mm resolution and ‘fine’ as usual, in hindsight that is overkill for a quick prototype. Mistake 1. Don’t overkill on quality on a prototype.

Started modelling at around 8pm, the modelling was straight forward as was the printing so everything was printed by midnight. Next comes the mistake, it is a BAD idea to code after midnight. I had most of the code prepared as part of a previous run, with meticulously commented code. Of course 1am me thought that code was bad and decided to ‘correct it’ – turns out it was the correction that was the bug and kept me debugging until 3am. Mistake 2. Avoid coding after midnight… This and the fact that I wanted to play it safe and test with both a wired and wireless Wii Nunchuk, on the assumption that the wired would be easier and more reliable. Of course I was wrong and the wired Nunchuk is/was probably defective. Mistake 3. Don’t assume things…
After sorting all that out I got lazy and instead of putting in the designed batteries, I slapped on a rather large LiPo battery with duct tape on the thing and tried it out. This video shows the ‘ooops’ result.
Mistake 4. Duct tape doesn’t really solve everything…
More lessons to be learnt next time!
Wish you had the 2 wheel launchpad code shared (I see the 4-anyway wheeled oddbot-launchpad, but a simple 2 wheel one would be easier to replicate sans-3dprinter).
Hi,
What example are you after? 2 Wheel servo driving with the nunchuk? You could use the 4 wheel version with small modifications. Let me know what you’re after specifically and I’ll try help 🙂
Yes, 2 wheel driving with nunchuck. Mainly so that it can rotate in place with two wheels, like a tank. Or turns while moving, like a normal rc. I can understand most of the oddbot-launchpad code (well commented) so I’m assuming it would be easy enough to remove the wii/i2c code to switch for a serial/bluetooth code (needs 2 8 bit byte for x and y axis, some other bytes for reseting, easy enough to change for added gpo, simple enough to configure for like a tablet bluetooth serial control), but some of the servo changing parts are a bit hard to understand (Rotate vs normal mode).
(I want to build a bad piggies car, and launchpads rock imho ha)
Hi, have you looked at http://www.madox.net/blog/2012/10/10/tl-wr703n-example-project-2-cute-exterminator-remote-control-toy/ ? This is basically a 2 wheel ‘thing’ which might help you.
I have, but its running off a linux router. I would like to run it off the launchpad (which I already have), plus the whole power difference. It’s really just the two wheel launchpad servo control part I need.
@cde, but the rover already had code that allows you to control 4 servos? That should let you run the 2 servos. On how to translate into movement, you’ll see that written in Javascript with the Dalek which is trivial to port to C for the launchpad. Are you getting stuck with that?