Just uploaded here as the “2013-02-23” images :-
http://code.google.com/p/madox/downloads/list
Will update project page later.
Perversions of an Engineer
Just uploaded here as the “2013-02-23” images :-
http://code.google.com/p/madox/downloads/list
Will update project page later.
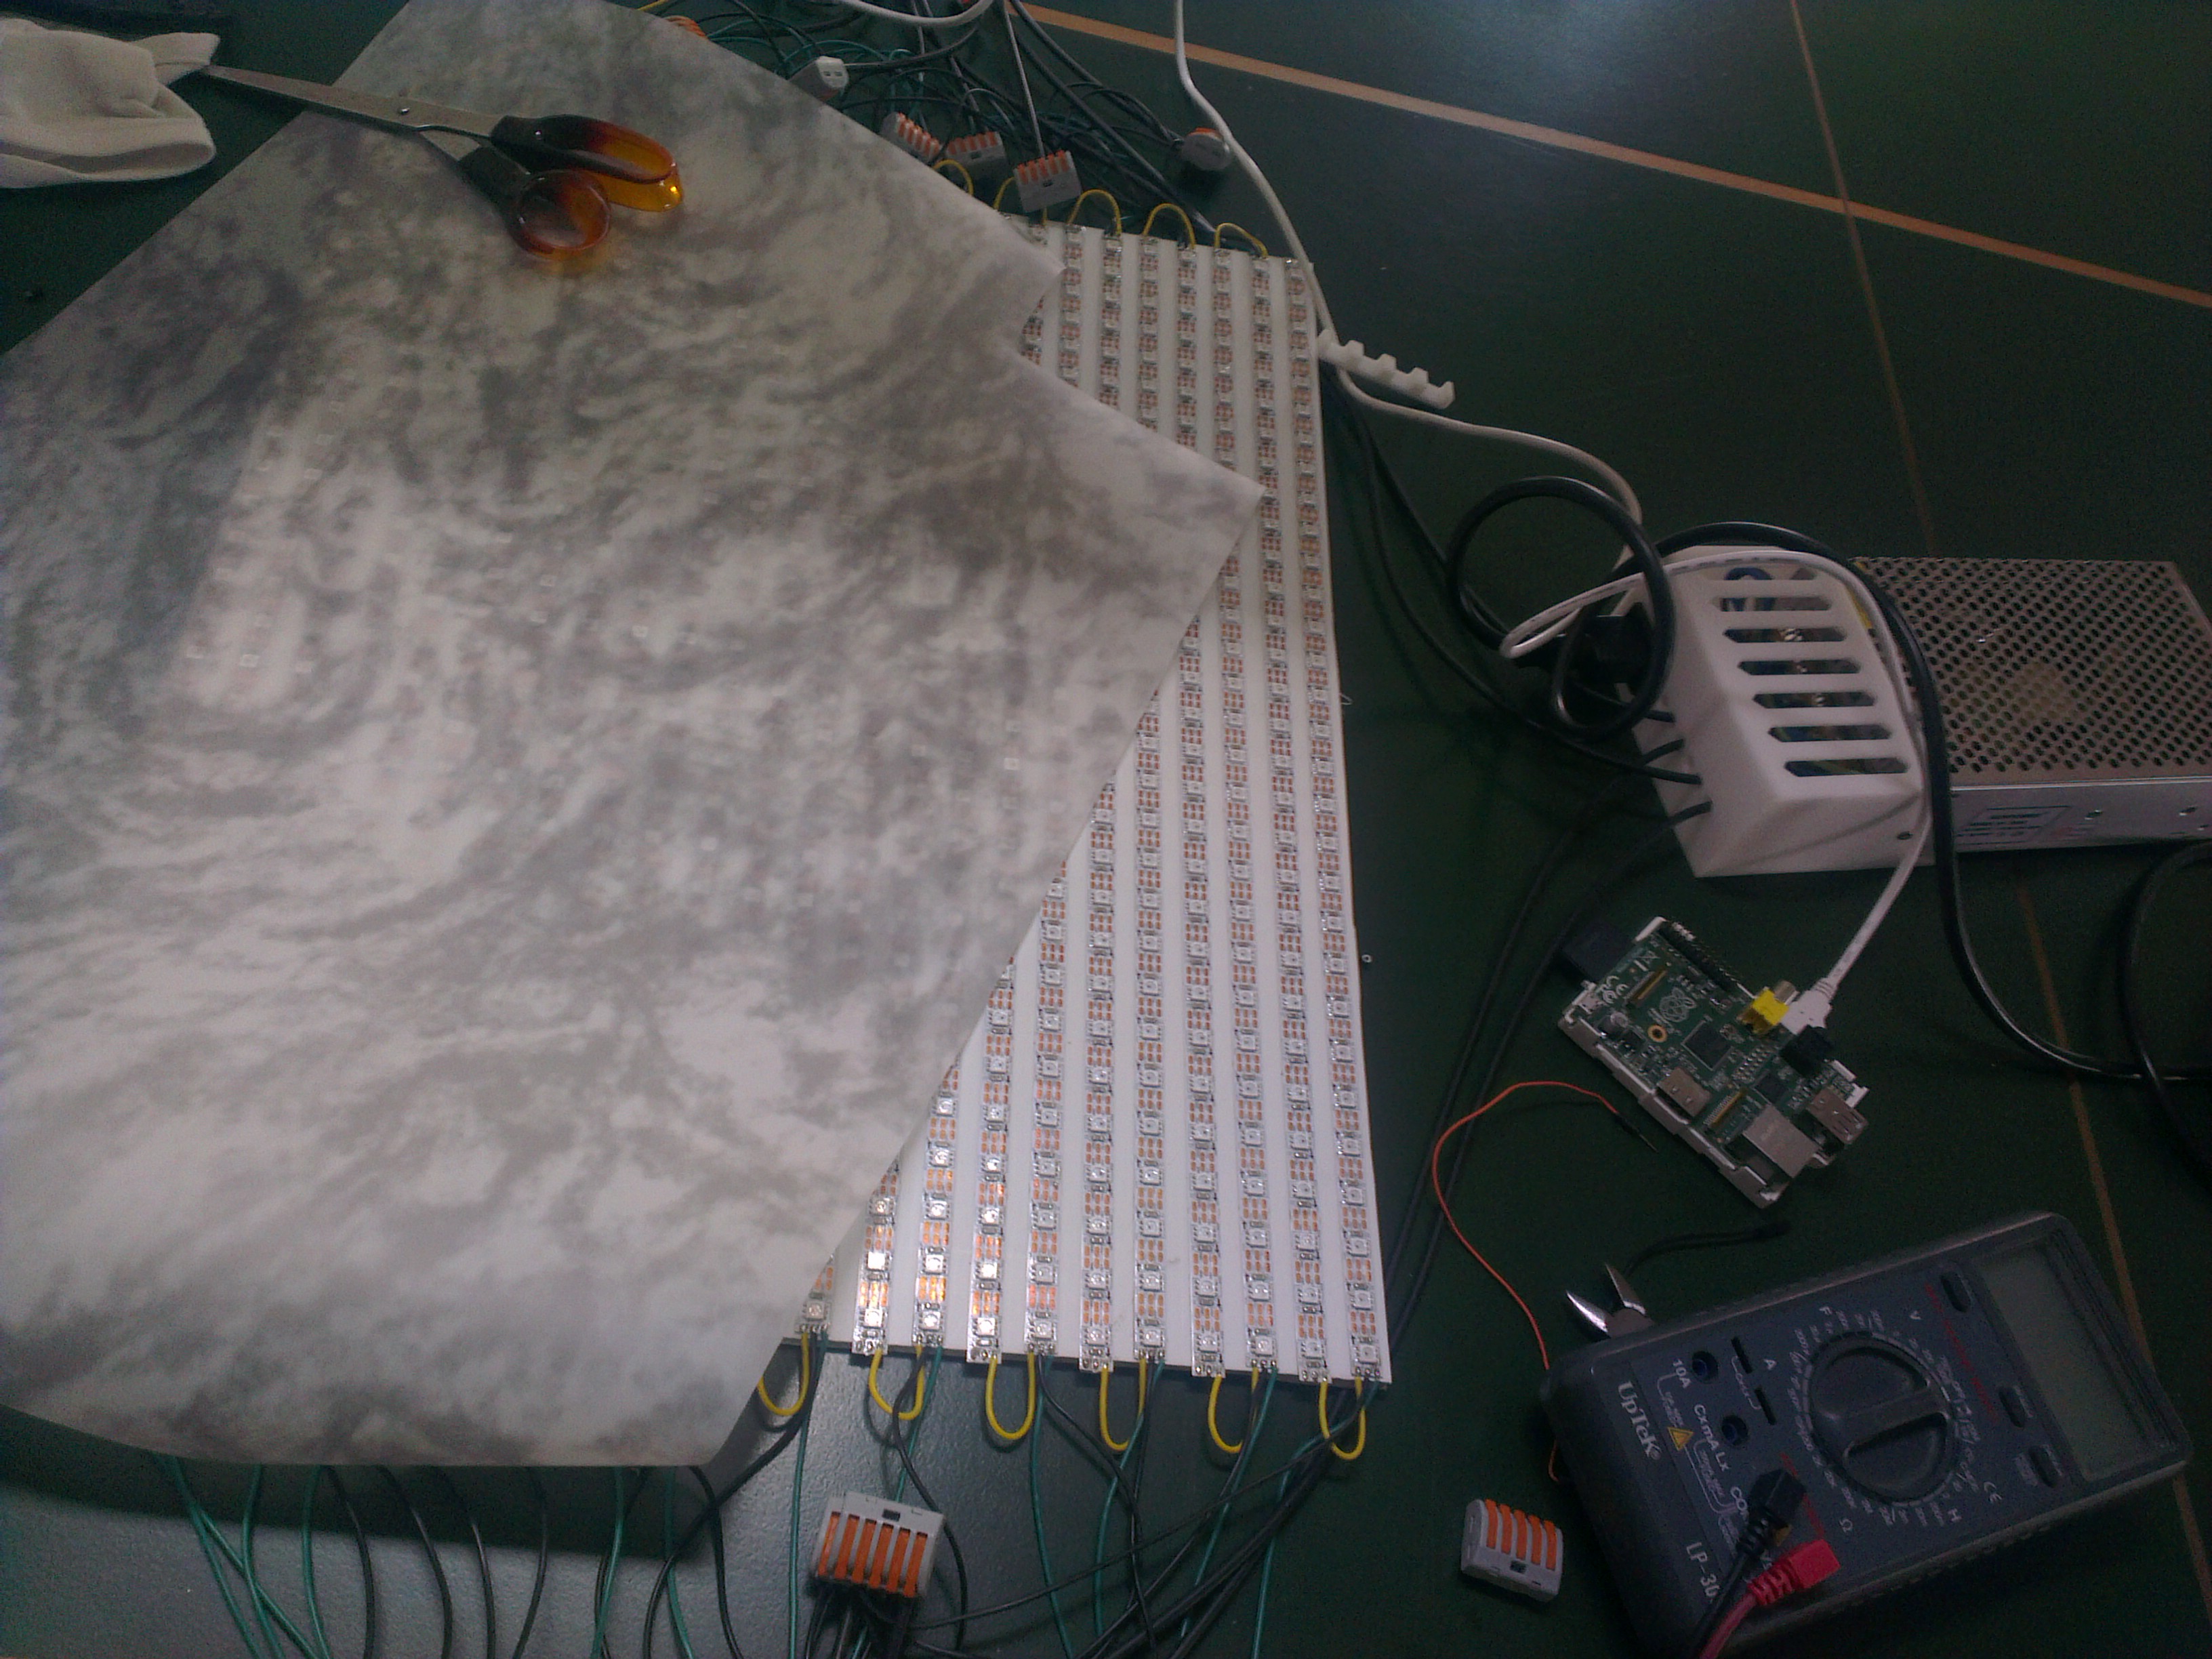
This is a project sneak peek at the LED lamp I am making. This post is really an excuse to post some random pics and videos, and a way for me to procrastinate and not actually finish the darn thing.
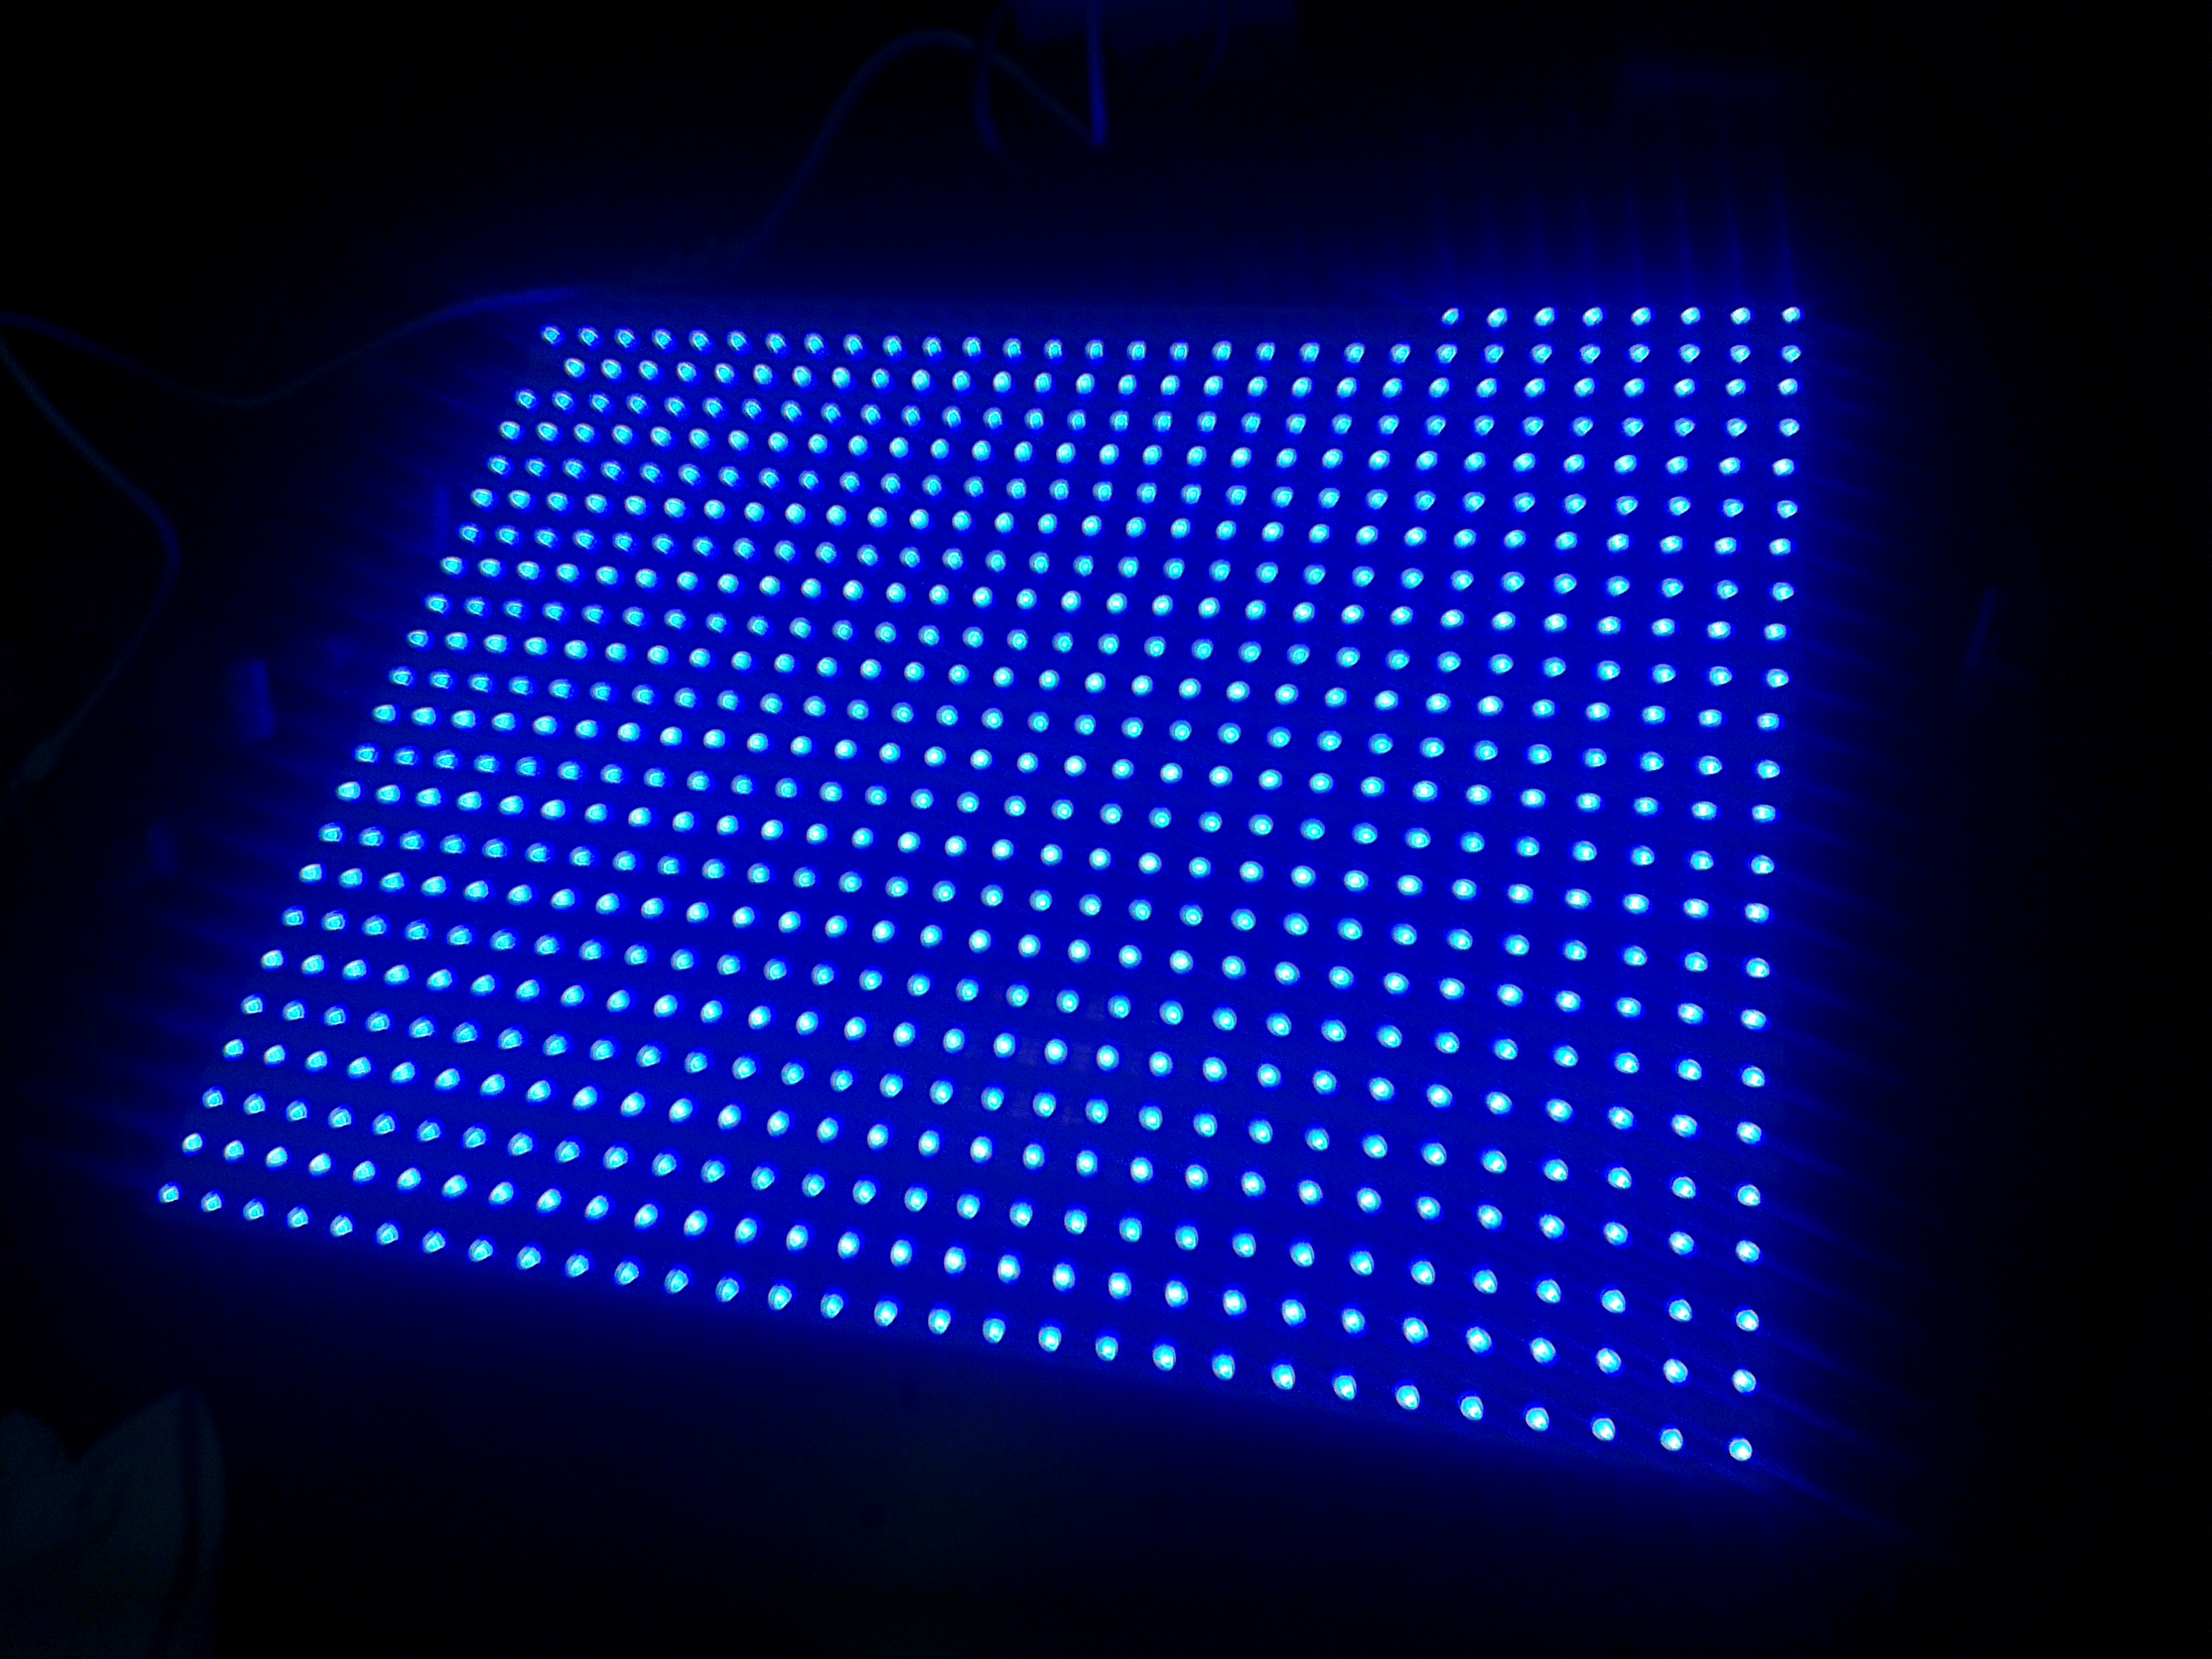
The project is a LED lamp that will be mounted on the wall. It comprises of 24 LED Strips of 30 LEDs each of which has an integrated WS2811 controller chip that enables individual addressing and 24bit RGB colour. The strips are driven by a Teensy 3.0, which then subsequently interfaces with a controller board that will do most of the processing. I hope to have it run games (e.g. Tetris) as well as turn on automatically at night, display the time and temperature and do some other random stuff.
Below is a video testing the display with Tetris…I haven’t drawn the border etc…and the pixels look fugly because it isn’t finished 🙂
The test setup is so crude, I just used scrap washi paper and dumped it directly on-top of the LED array.
I’m still debating on what I should use as a controller for the games. Waiting on a “DDR mat” from eBay to arrive so I could test that, but I would appreciate any novel ideas people can suggest!
Some more pics after the break 🙂
So it has taken me over three months of procrastination of building a USBIP image that will let me connect to my 3D printer wirelessly to actually writing up a tutorial to share it with the world. This tutorial provides the basics of setting up a fresh TP-Link TL-WR703N image to wirelessly connect a Windows machine to a USB device attached to the router. I am using primarily using this to connect to my pp3dp Up! printer (only reason this is for Windows…), but I have also tested this method on a USB Logitech webcam and a USB flash disk.
Again, a disclosure is that I am an affiliate to 3D printing systems and that if you’re interested in buying an Up! Plus or Up! Mini and you’re in Australia/New Zealand you should do it via this link 😛
Self explanatory photo post… or just an example of over-exposed phone photography…


I’m printing a bunch of these to hand out as trinkets at the local hackerspace. Demonstrates how a 3D printer can be used to make stuff, and handy enough for everyone to be able to find a use for it!
")

Will be uploading this to Thingiverse in a tick…
The Cute Exterminator is another demonstration project using the TP-Link TL-WR703N router to create a WiFi enabled remote control toy. It shows how the router can be used to control servos with minimal programming other than with html/javascript and a single line of shell script.
Again (well I repeat this a lot), not a comprehensive write up because it was a quick a dirty build but read on for the short description and a visual walk-through.
Continue reading “TL-WR703N Example Project 2 : Cute Exterminator (Remote Control Toy)”

The BitBltBlade is a demonstration project using the TP-Link TL-WR703N router and Kean’s Expander board. It interfaces with a strip of 24 RGB LED’s for generating images superimposed on backgrounds using long exposure photography. It is basically a copy of Gavin’s Lightscythe implemented using different hardware and software.
Again this is not a comprehensive write-up, but a quick example of a TL-WR703N project [it took me 8 months to decide to make it, 1 week to actually make it, and 3 more months to decide to write about it OK! 44 weeks of procrastination for 1 week of work so don’t expect too much!]. Short write-ups for the Cute Exterminator and using the router for remote USBIP will come this week.
Project check list :

Continue reading “TL-WR703N Example Project 1 : BitBltBlade”

No actual write-up goes with this post other than a gallery full of photos for 3D printing enthusiasts. This was an exercise to demonstrate how large models can be printed using the Up! printer [Hah! if you buy use this affiliate code please!]. The hub of the wheels are about at the limit of the platform size of the printer but the body is constructed in a modular manner.
The rover itself is driven by 4 cheap continuous rotation servos like the original, interfaced with a cheap MSP430 Launchpad and controlled by a wireless Wii Nunchuk. The webcam in the photo above is connected to a TP-Link TL-WR703N which acts as an access point and streams to any WiFi device with a web browser (iPad above…not mine!).
Edit : Forgot to add Youtube test video as usual!
New project page added for the TP-Link TL-WR703N router here :- http://www.madox.net/blog/projects/tp-link-tl-wr703n/
All the installation instructions are inside that page, here are a few draft quick starts :-
Note, you should do this prior to any other step. The USB will replace the standard overlay for storing your settings, so doing it later will be messy.
Turn blue led on :
echo "1" > /sys/devices/platform/leds-gpio/leds/tp-link:blue:system/brightness
Turn blue led off :
echo "0" > /sys/devices/platform/leds-gpio/leds/tp-link:blue:system/brightness
Blink blue led on/off :
cd /sys/devices/platform/leds-gpio/leds/tp-link:blue:system/
echo timer > trigger
echo 100 > delay_on
echo 100 > delay_off
Note : The delay_on value must be less than 255
More tricks and quick how-to guides coming up including installing additional software and setting up a webcam streaming. For those who know how or can figure out how, the images point to a software repository where you can install more software once you have internet access!
Upfront disclosure : I am/was/is/might be a reseller/affiliate/enthusiastic end user of the pp3dp Up! printer. Though these connections are how I managed to get my grubby little hands on an Engineering prototype of the Up! Mini printer. Those who know me will see that the following is an unbiased opinion, or it should be obvious from all the semi-negative points.
The Up! Mini is listed on pp3dp’s blog as to be revealed at “Rapid 2012” in Atlanta on May 22, but since Australia is nicely ahead of the rest of the world I think the first unveiling was actually at CeBIT Australia 2012 by the Oceania Distributor 3D Printing Systems. Seeing the printer at an expo is one thing, getting a hands on feel is much more satisfying. I had the printer at my disposal for the weekend, apparently I’m the first outside of pp3dp to receive one of these and I really appreciate the opportunity to peek.
I’ve owned the standard Up! Since Sep 2010 when it was first released and have managed to entice a number of people with the printer (~10 Up! owners within the Sydney Hackerspace) since then. The Up! Mini is the first refresh since almost two years of a proven and reliable 3D printer design.
Error: the communication with Picasa Web Albums didn’t go as expected. Here’s what Picasa Web Albums said:
404. That’s an error.
The requested URL /data/feed/api/user/114506261366431391535/album/UpMiniPreview?kind=photo was not found on this server. That’s all we know.
Lets have a look at the technical details :-
It is clear from the design and build that the Up! Mini shares a history with the Up! One of the best features of the Up! printer compared to the competition is that it is truly plug and play and ready to print, that tradition is carried over to the Up! Mini through the use of the same software with auto-support generation. It is simply load a model and press print.
There are a few incremental design ‘improvements’ such as the heated build platform. It is now a PCB platform with a distributed heating element/track to provide for a more consistent platform temperature. I put ‘improvements’ in quotations, because while this is good in theory, I couldn’t get a decent result in my quick tests with significant warping.
Many people are familiar with the Up! so lets iterate through the differences and other noticeable things I noticed during my short hands-on experience. “(-)” denotes that I see it as a negative, “(+)” for those I think is a positive and (^) is like a ‘meh’.
Video :
Of me using the printer “out of the box”, with a couple of ‘DUH’ fails on my part thinking that I’m an experienced user and that I don’t need to follow the manual (e.g. I forgot to install the USB drivers).
http://www.youtube.com/watch?v=szUmC37N9aY
The Up! Mini is obviously a consumer orientated 3D printer, with good aesthetics and the enclosure to provide a more polished professional look. The price has significantly been slashed in response to the competition, and to match it has lowered the bar slightly in my opinion. The Up! Mini is NOT an upgrade for existing Up! owners in my opinion, the name implies it is a lower end model for the price conscious consumer.
To me, it is intended to challenge the ‘Cubify’ from 3D Systems and from what I’ve seen, the Up! Mini is a winner with a lower initial cost as well as cheaper (though still relatively expensive) running costs (filament).
EDIT : If you buy an Up! from 3D Printing Systems, use my affiliate code 😉
Just a quick post on the new fan holder (aka “Wind Barrier V7”) for the Up! pp3dp printer that I’ve been trialling for a couple of days. The previous holders blew onto the extruder heatsink whereas the new design blows partially onto the model.
I’ve had the design for a while now but have been procrastinating and sat on it for a while. That is until seeing how well an Ultimaker worked with its ducted fan attachment.
Jumping to the results, it actually works alot better!
Off topic, but there is a duck in those photos… it looks a bit weird but its a prototype. Plus the weird details like the screw thread attachment serves well to show how cleanly the supports come off now (I only used my hands in all the photos below! Seriously!)